X-Ray Lead Generator Installation Guide
 Updated
by
Raquel Bartolome
Updated
by
Raquel Bartolome
Google Tag Manager
1. Log into Google Tag Manager and navigate to Tags > Add A New Tag.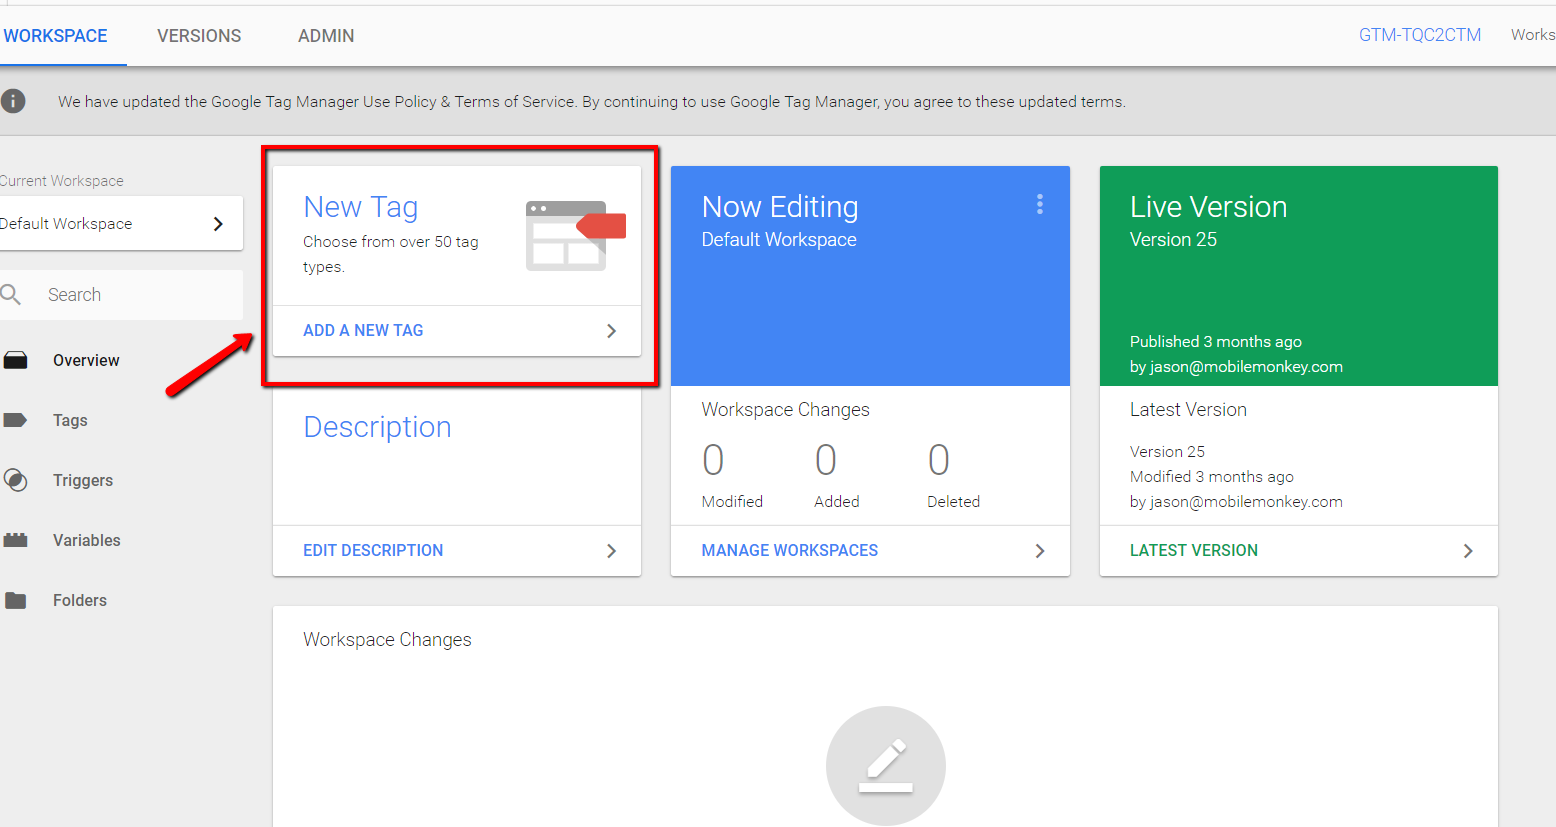 2. Select “Custom HTML” as your tag type.
 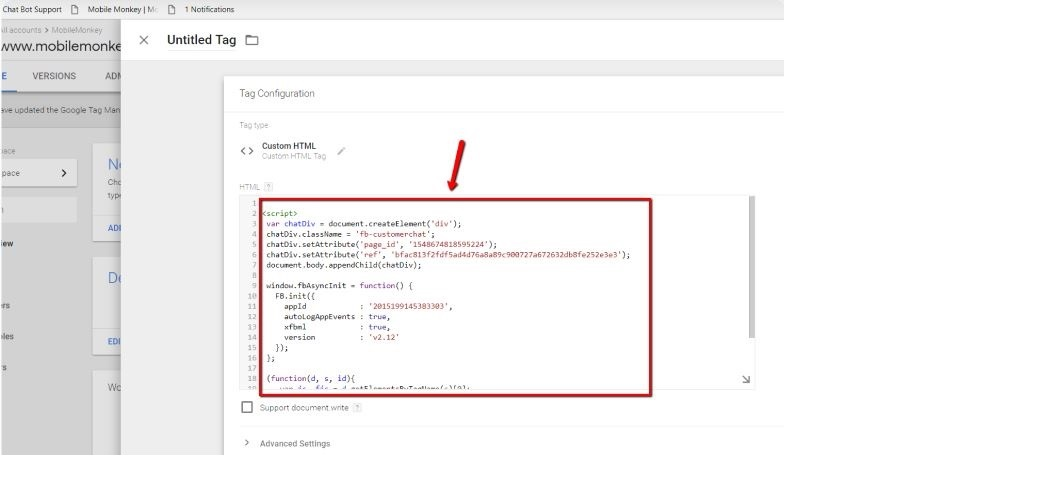 3. Paste the code for your Web Visitor Email Detector.
 4.Click "Choose a trigger" and select “All Pages."
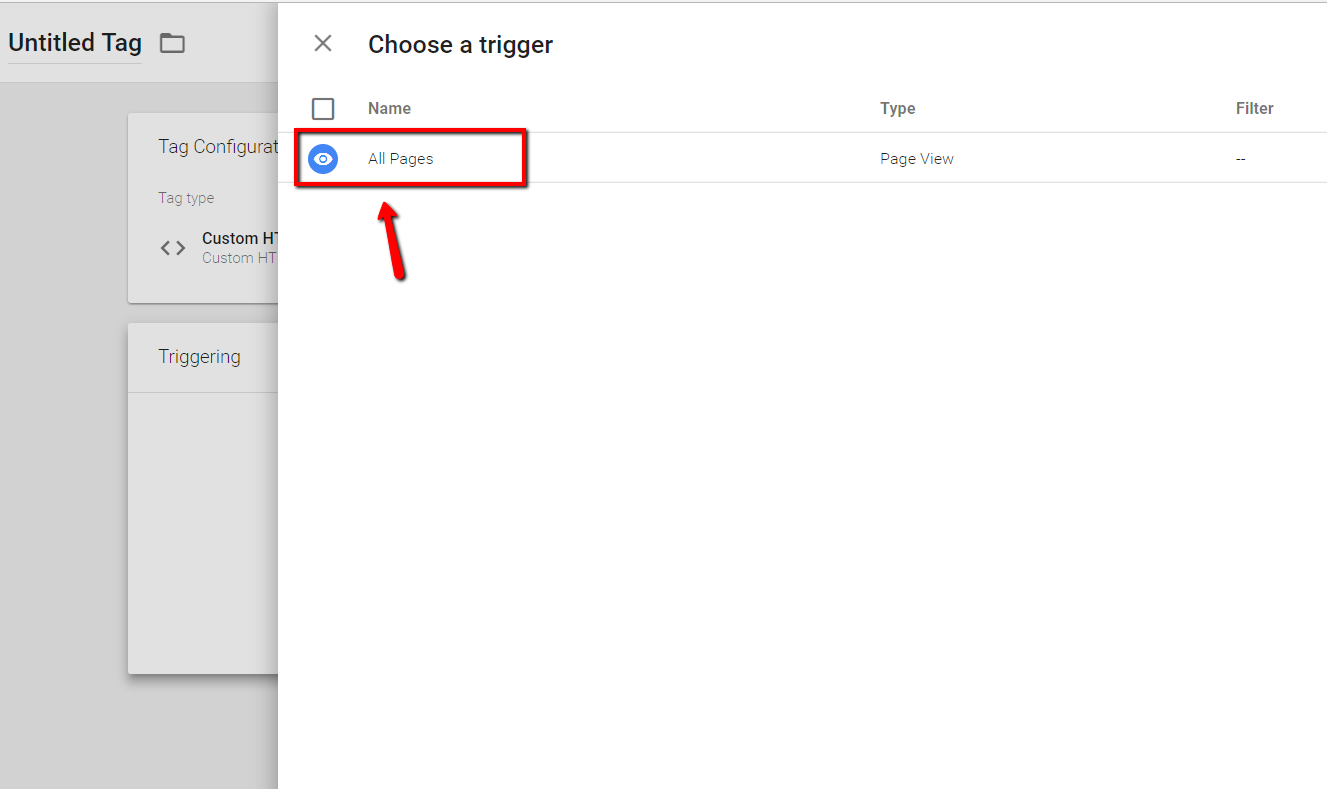 5. Name and save your tag.
  6. Verify the script is working correctly.
  7. When you are ready to go live, go into your X-Ray Lead Generator Input Trigger in Customers.ai and click Activate (at the top of the trigger editor)
2. Select “Custom HTML” as your tag type. 3. Paste the code for your Web Visitor Email Detector.4.Click "Choose a trigger" and select “All Pages."5. Name and save your tag. 6. Verify the script is working correctly. 7. When you are ready to go live, go into your X-Ray Lead Generator Input Trigger in Customers.ai and click Activate (at the top of the trigger editor) WordPress
1. In the WordPress site go to Appearance -> Theme Editor.  2. On the right panel Theme Files find Theme Header (header.php) file and click to open it.
  3. Find the opening <head> tag and put cursor right below it.
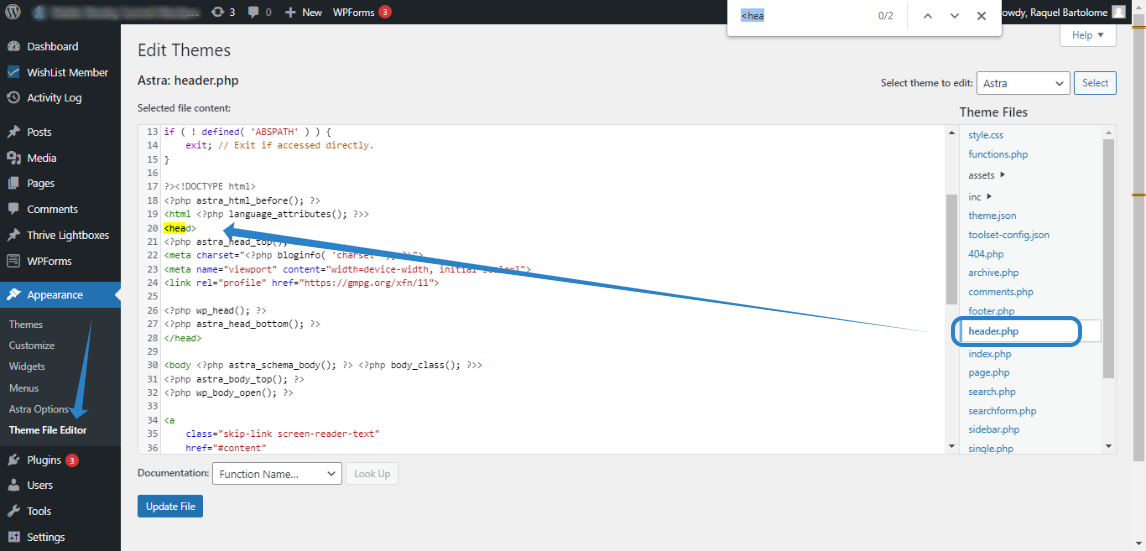 4. Paste the code for your Web Visitor Email Detector.
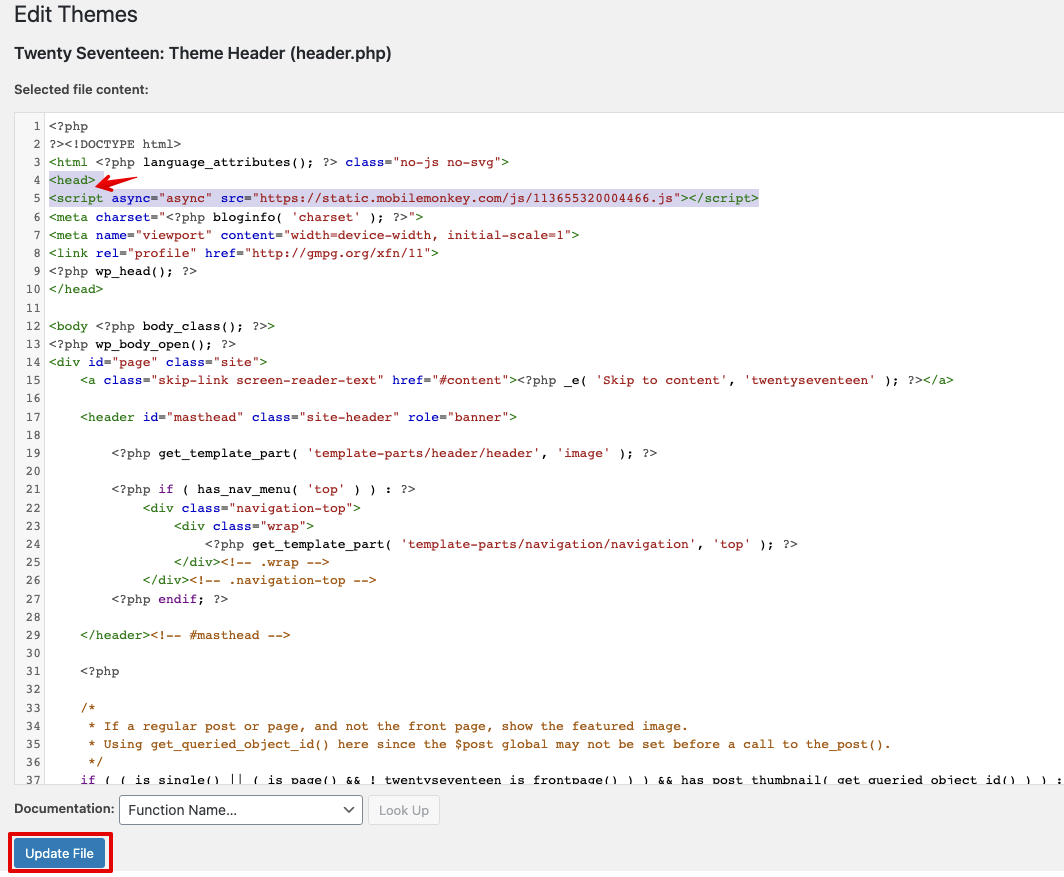 5. Verify the script is working.
  6. When you are ready to go live, go into your X-Ray Lead Generator Input Trigger in Customers.ai and click Activate (at the top of the trigger editor)
2. On the right panel Theme Files find Theme Header (header.php) file and click to open it. 3. Find the opening <head> tag and put cursor right below it.4. Paste the code for your Web Visitor Email Detector.5. Verify the script is working. 6. When you are ready to go live, go into your X-Ray Lead Generator Input Trigger in Customers.ai and click Activate (at the top of the trigger editor) Other Installation Guide (Manual)
1. Paste the code below immediately after the <head> tag on every page where you want it to appear. 2. Verify the script is working correctly.
  3. When you are ready to go live, go into your X-Ray Lead Generator Input Trigger in Customers.ai and click Activate (at the top of the trigger editor)
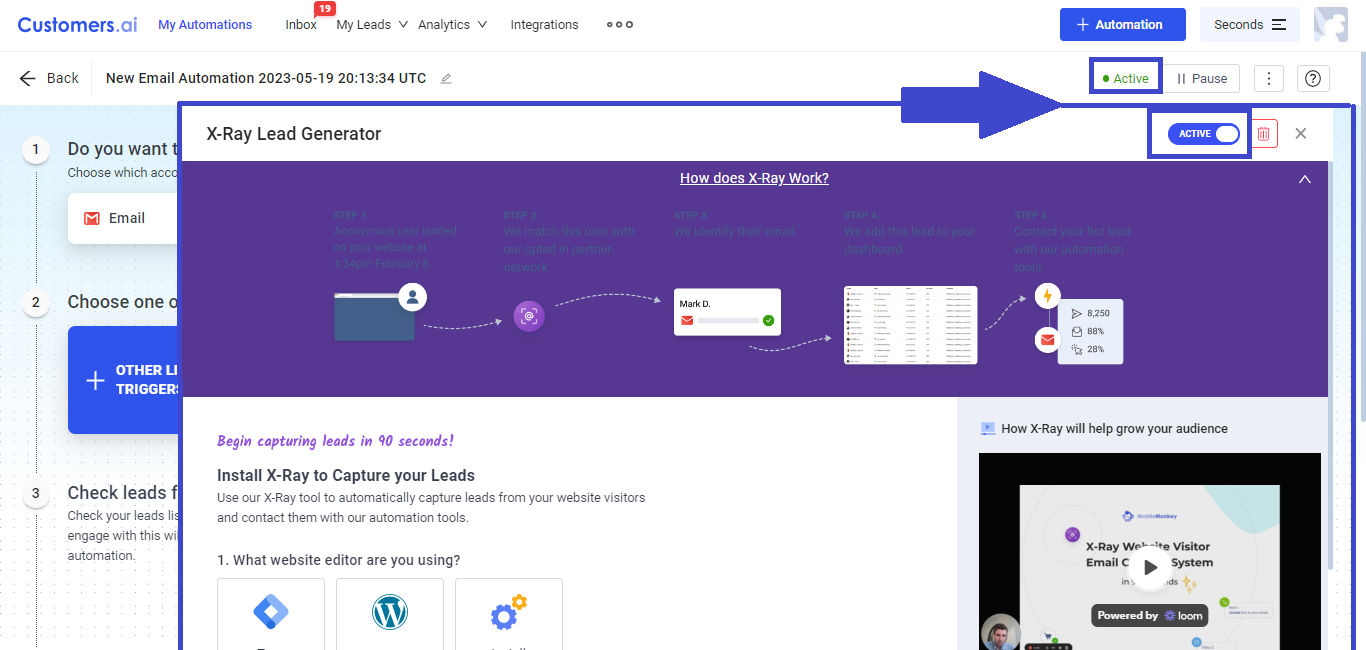
2. Verify the script is working correctly. 3. When you are ready to go live, go into your X-Ray Lead Generator Input Trigger in Customers.ai and click Activate (at the top of the trigger editor) Please take note that IF you are already installed the Website Chat widget of Customers.ai, there is NO NEED for you to install the X-Ray Lead Generator code on the same website. Kindly create and activate an X-Ray Lead Generator Input Trigger only, by doing this, you can specify which pages on your Website should email collection be triggered. Please refer to this guide.