MobileMonkey 101: Creating a simple Chat Starter and Dialogue (Part 2)

Have feedback on this article? Email product@mobilemonkey.com
Welcome to Part 2 of our two-part guide for making your MobileMonkey Chatbot respond to users who click the Send Message button on your Facebook Page and ask them some important questions and based on those questions segment and build your audience.
In Part 1, we configured our Facebook Page Welcomer and Notification widget.
If you haven't completed Part 1 yet, click here to check it out!
In Part 2, we'll edit our dialogue to segment our audience.
Step 1: Ask a qualifying question
If your Facebook Page receives a lot of messages, your Chatbot can help sort out the most important ones. Let's add a qualifying question to show how!
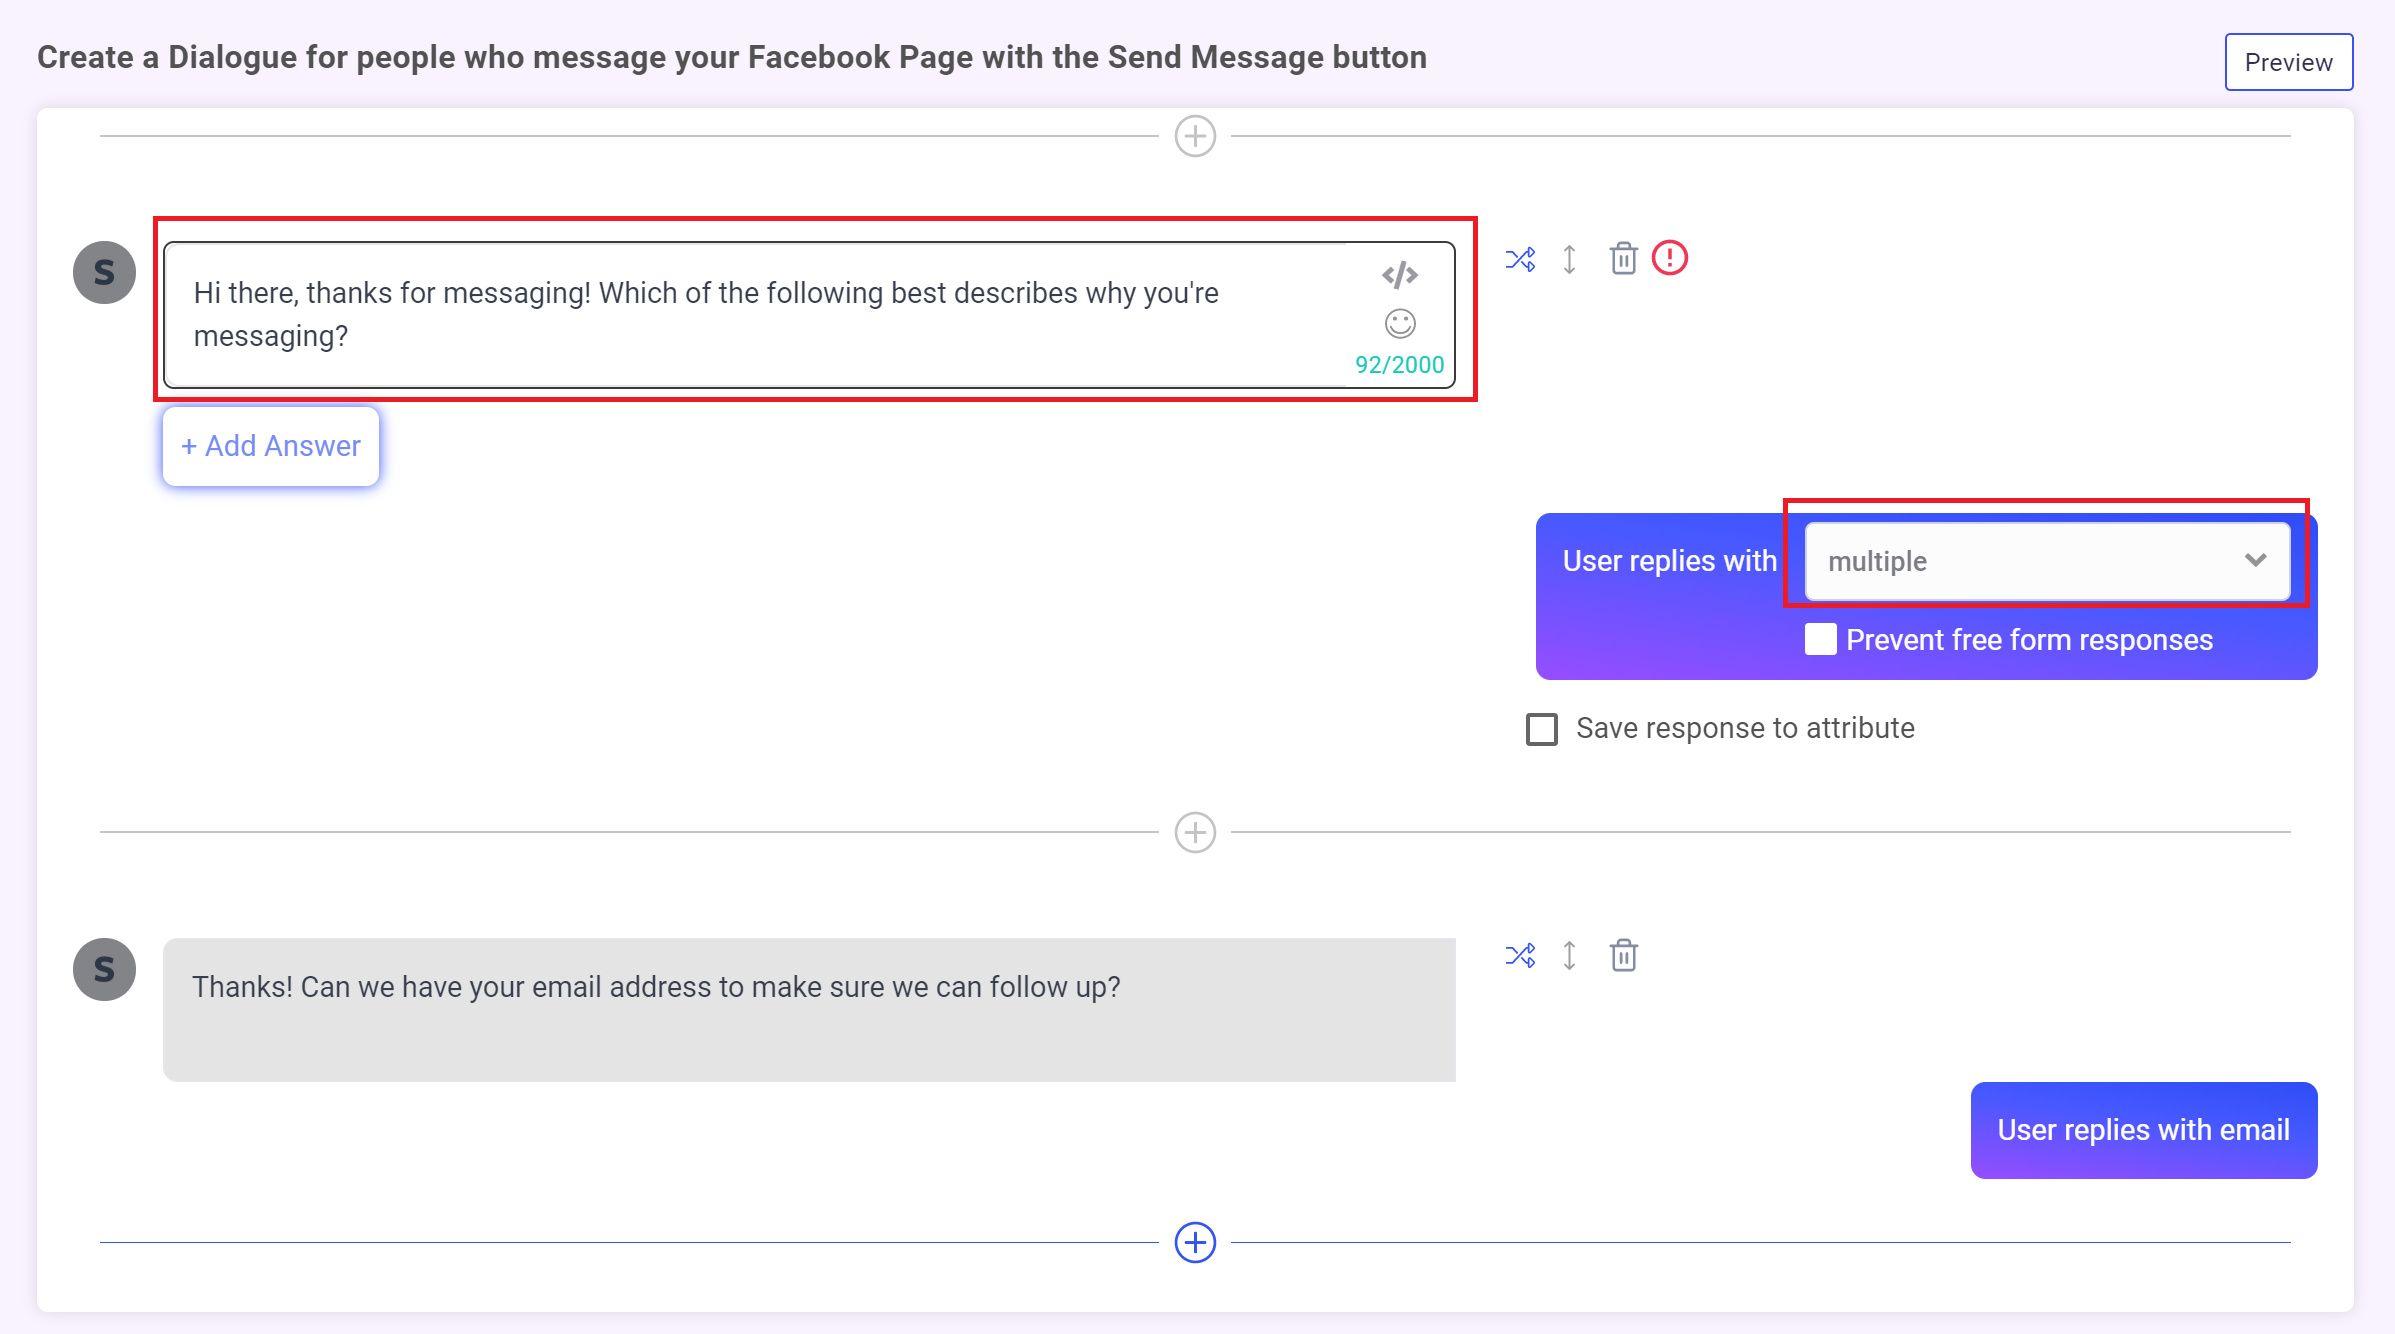
First, Open up your Facebook Page Welcomer or other Chat Starter that you created in Part 1
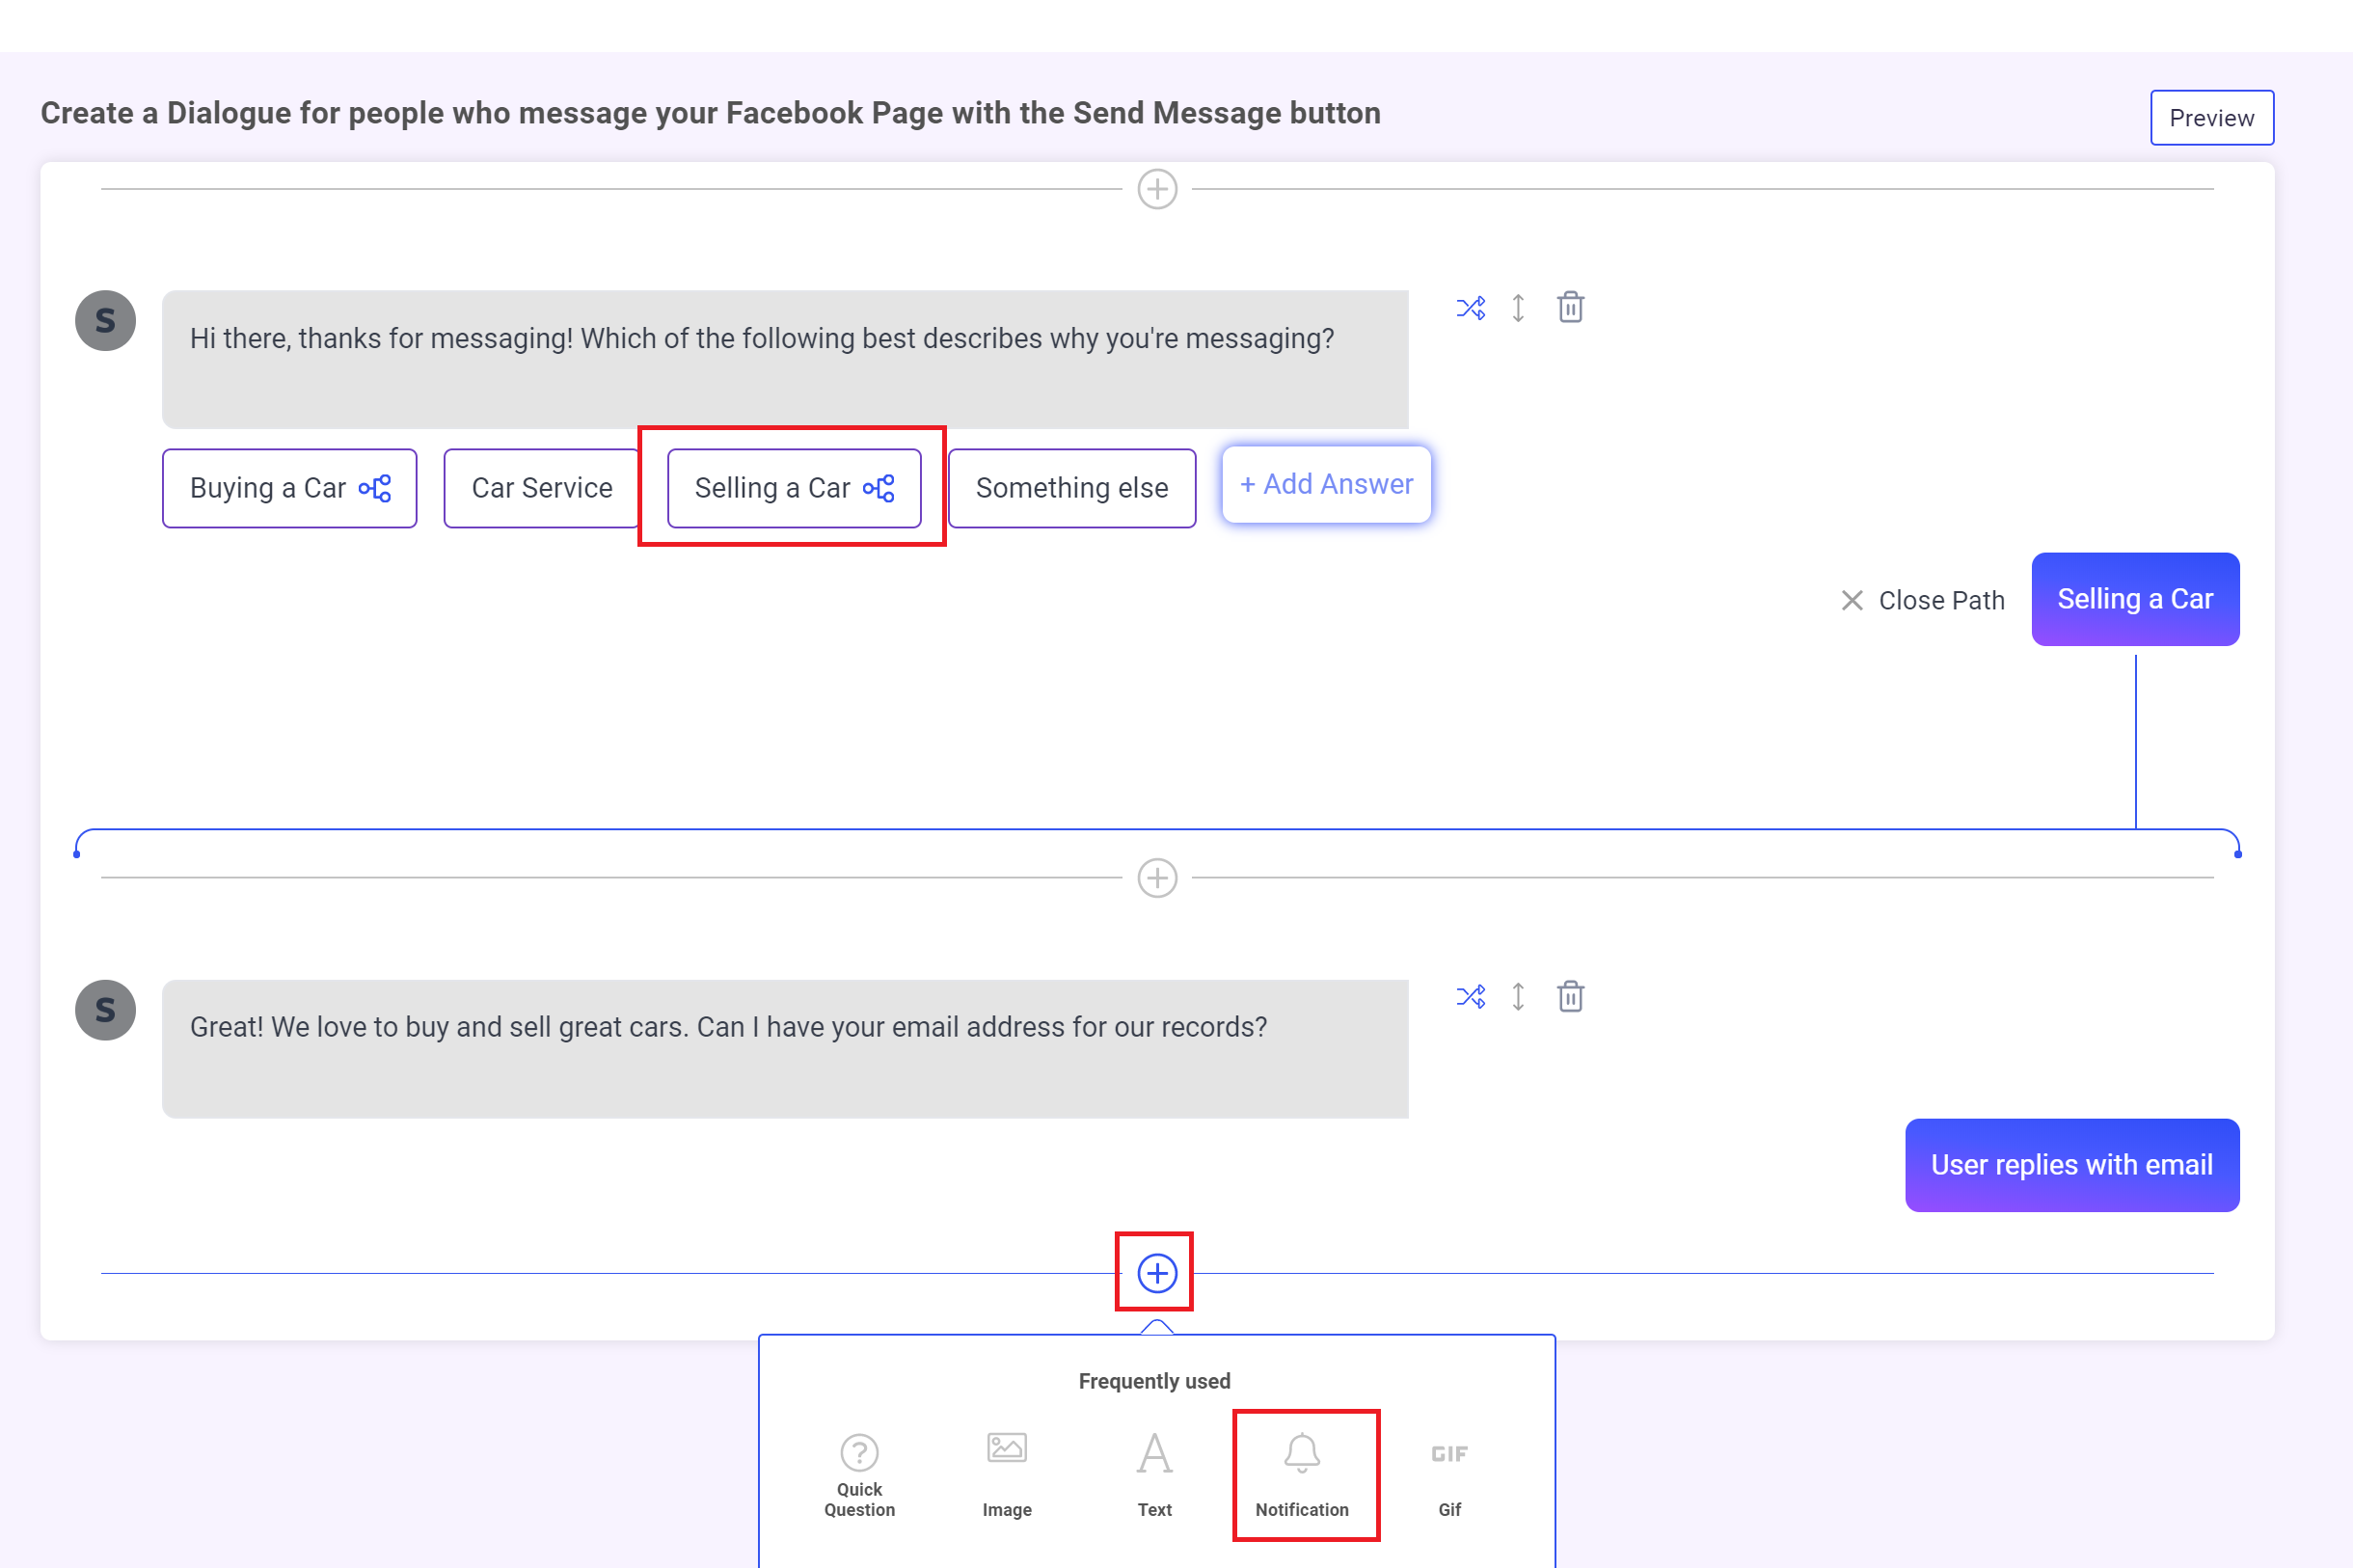
Update your first question to be multiple choice instead of freeform text
For this example, I'll update the first message to be a multiple choice response instead of a text response. This will help me sort out the better leads.
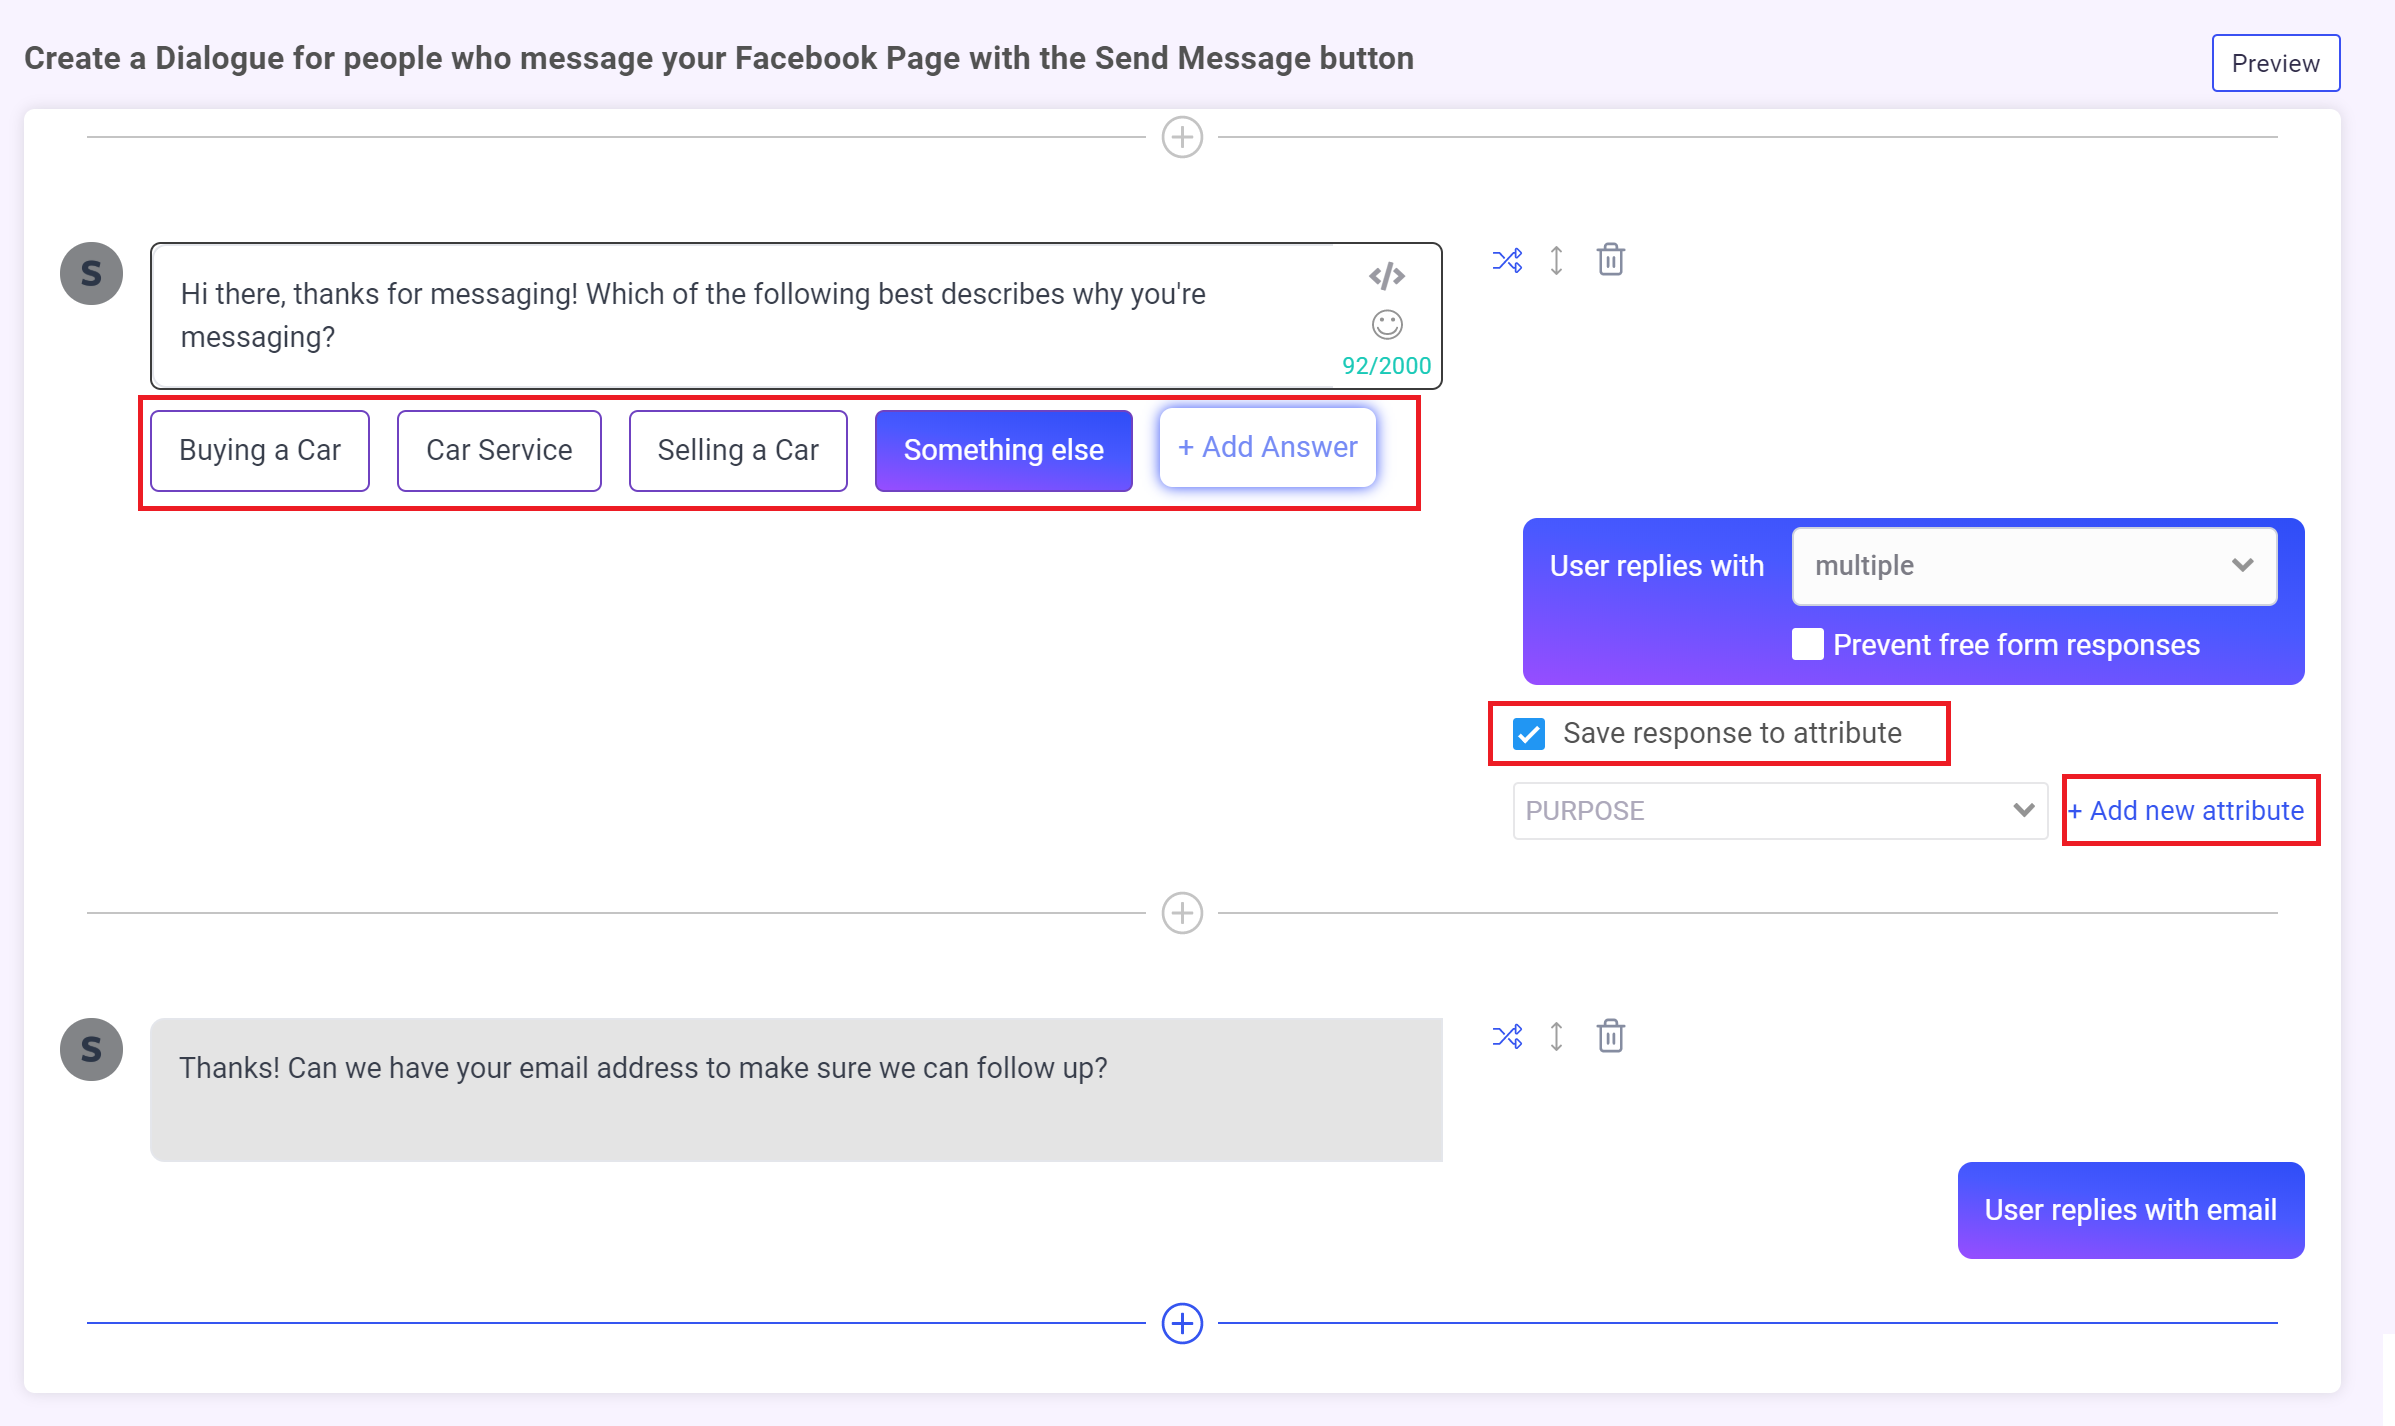
Add some answers
My page is a used car dealership, so I'll try to identify the leads who are interested in buying or selling a car so that I follow up with them ASAP.
Tip: Make sure you check off Save response to attribute so you can easily check back to see why each person contacted your page! You can choose an existing attribute or add a new one on the fly.
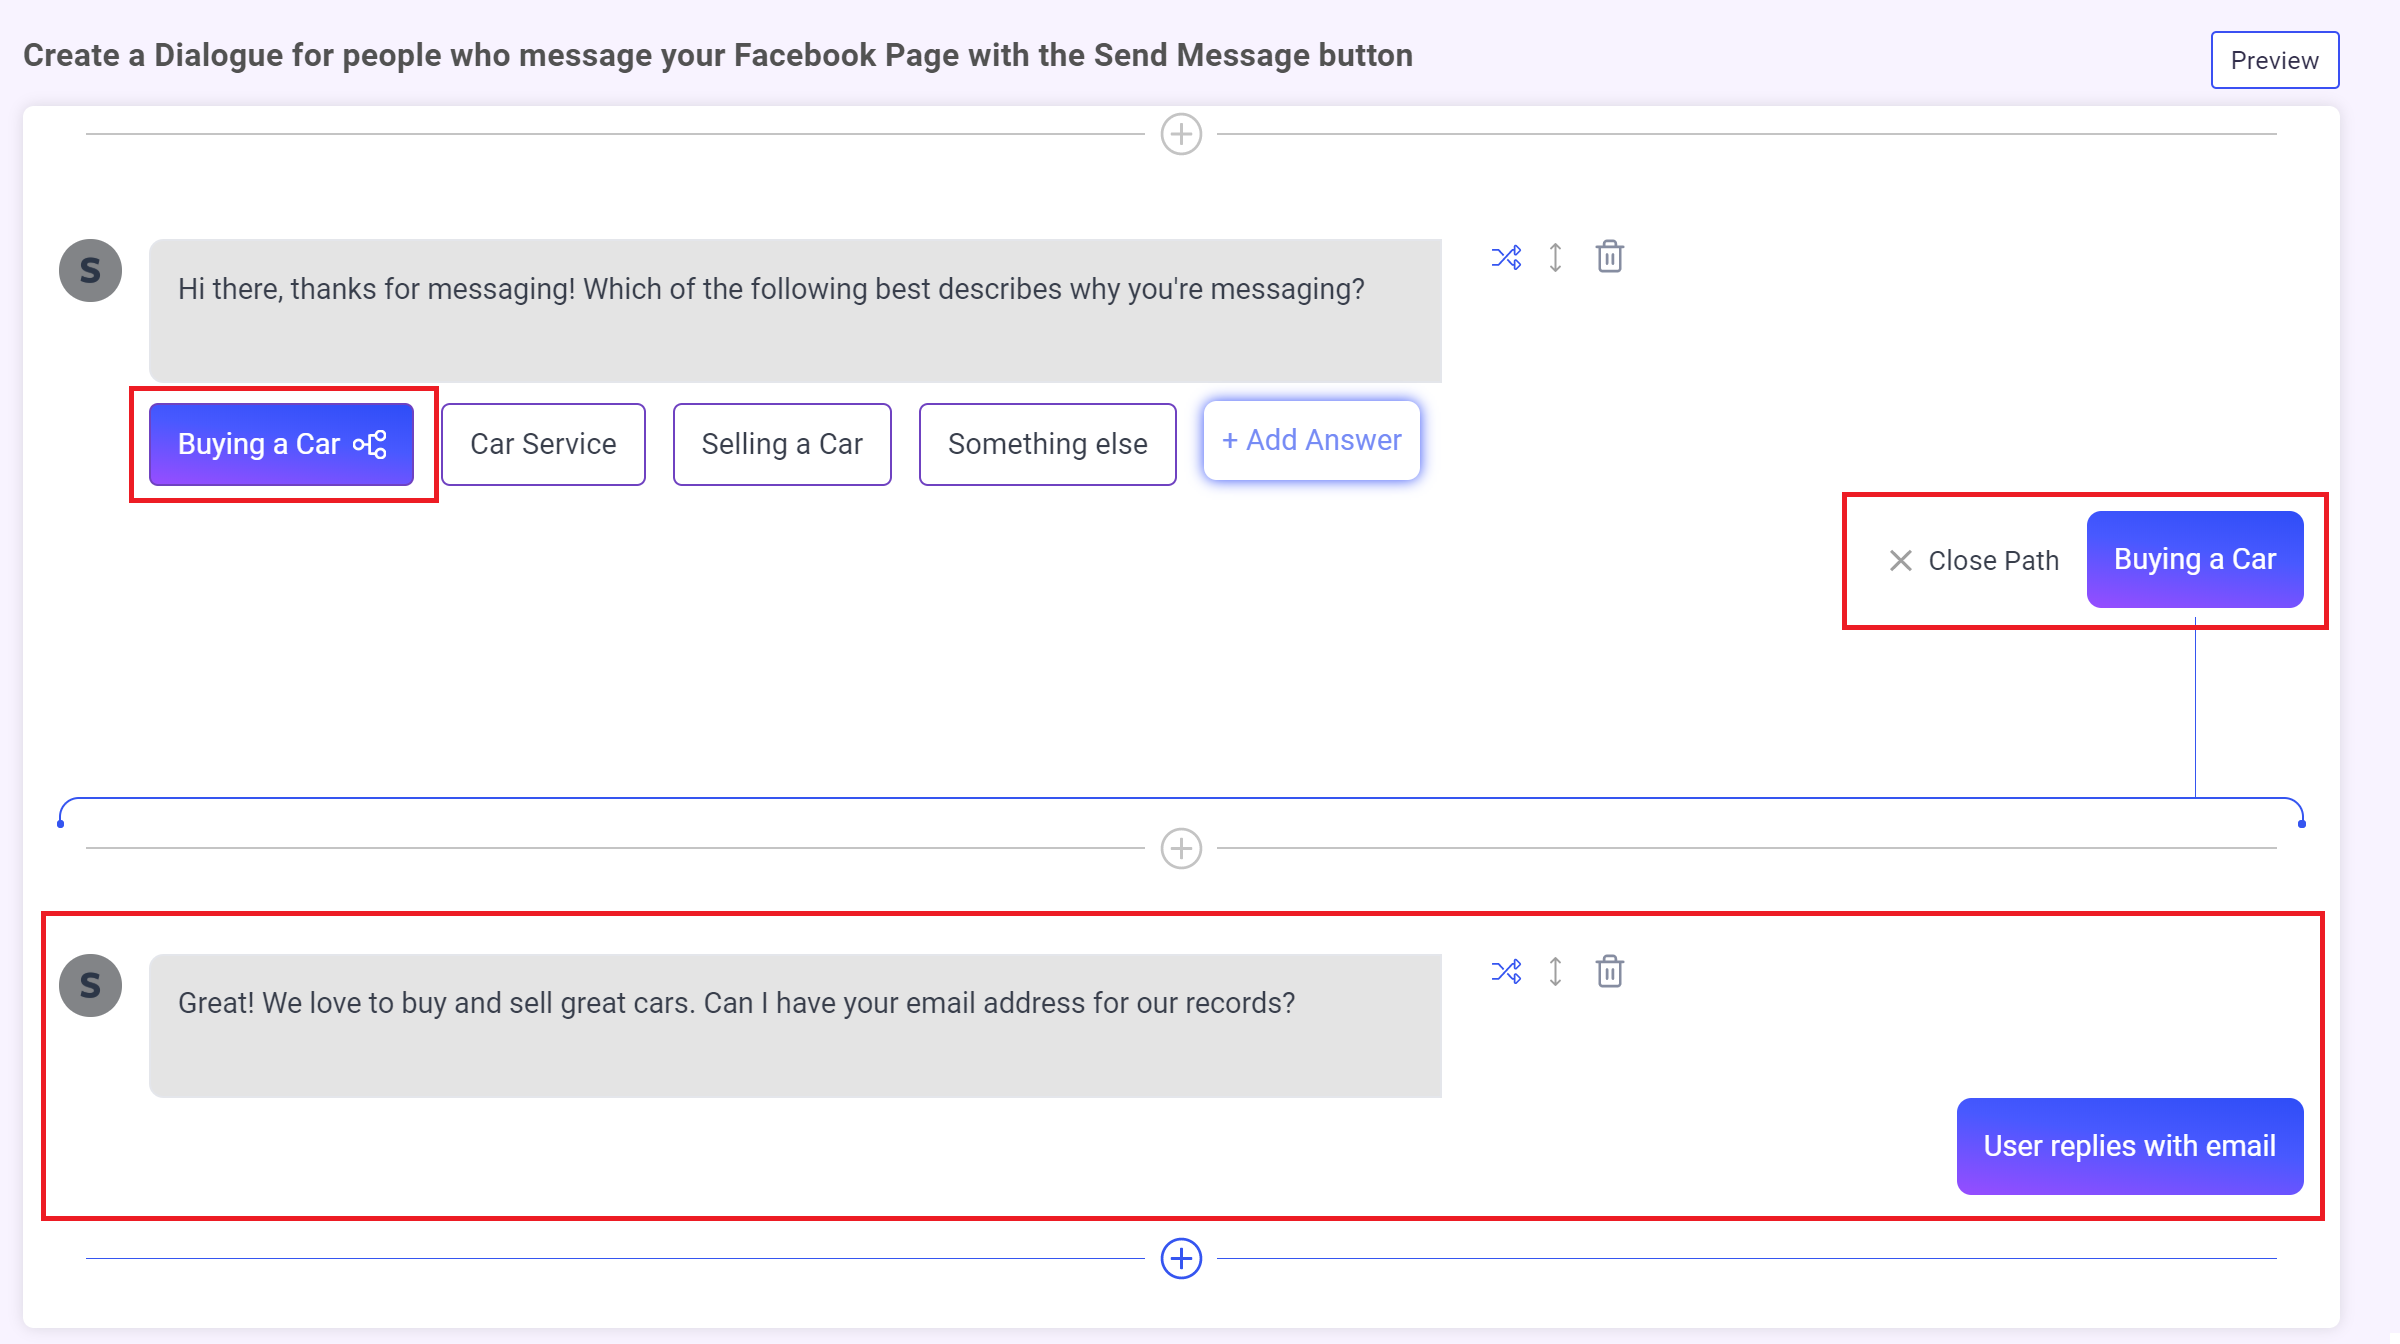
Take qualified users to a new Dialogue
- Click the first response that marks users as qualified.
- In the Take users to a new Dialogue? dropdown, click + New Dialogue
- Name it Qualified and click Create

Ask for the email address on this new Dialogue
Since we're sending qualified users to a different dialogue, we have to re-add our email question.
But, now that we've segmented qualified from unqualified conversations, we can get more specific and targeted in our content!
Hook up any other qualified answers to the new Dialogue
If you have other answers that you want to send to this same dialogue, you can easily reuse the content you've just created
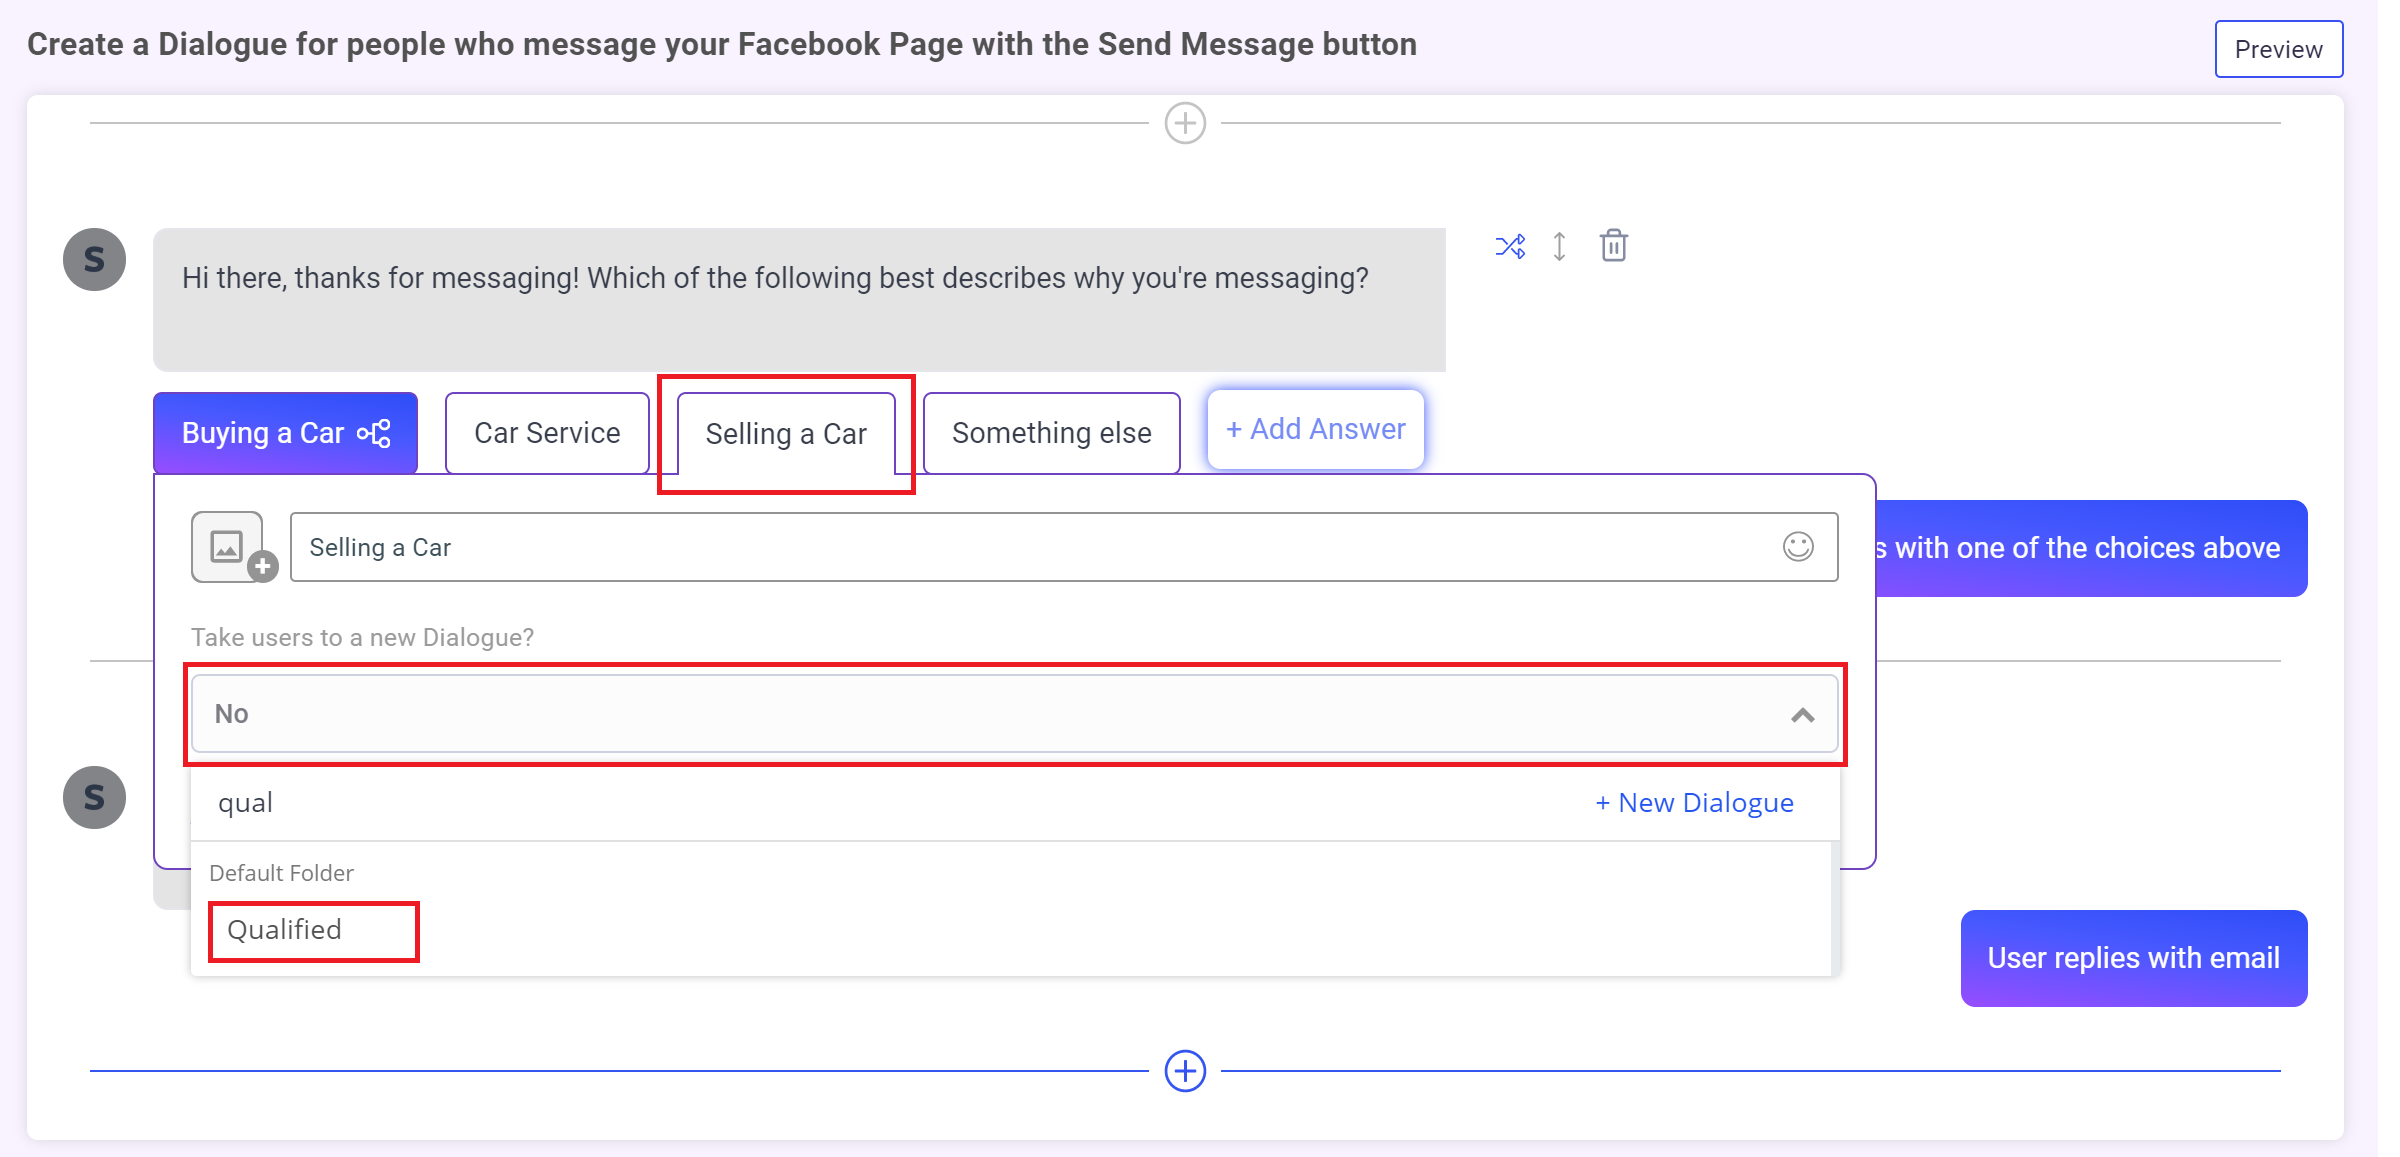
Great! Now any user who chooses "Buying" or "Selling" will go to a new Dialogue, while users who chose "Car service" or "Something else" will remain in the original dialogue.
Step 2: Put your notification widget on your Qualified Dialogue
Go to your Qualified Dialogue by clicking on one of the paths
- Click the + icon
- Add a Notification widget
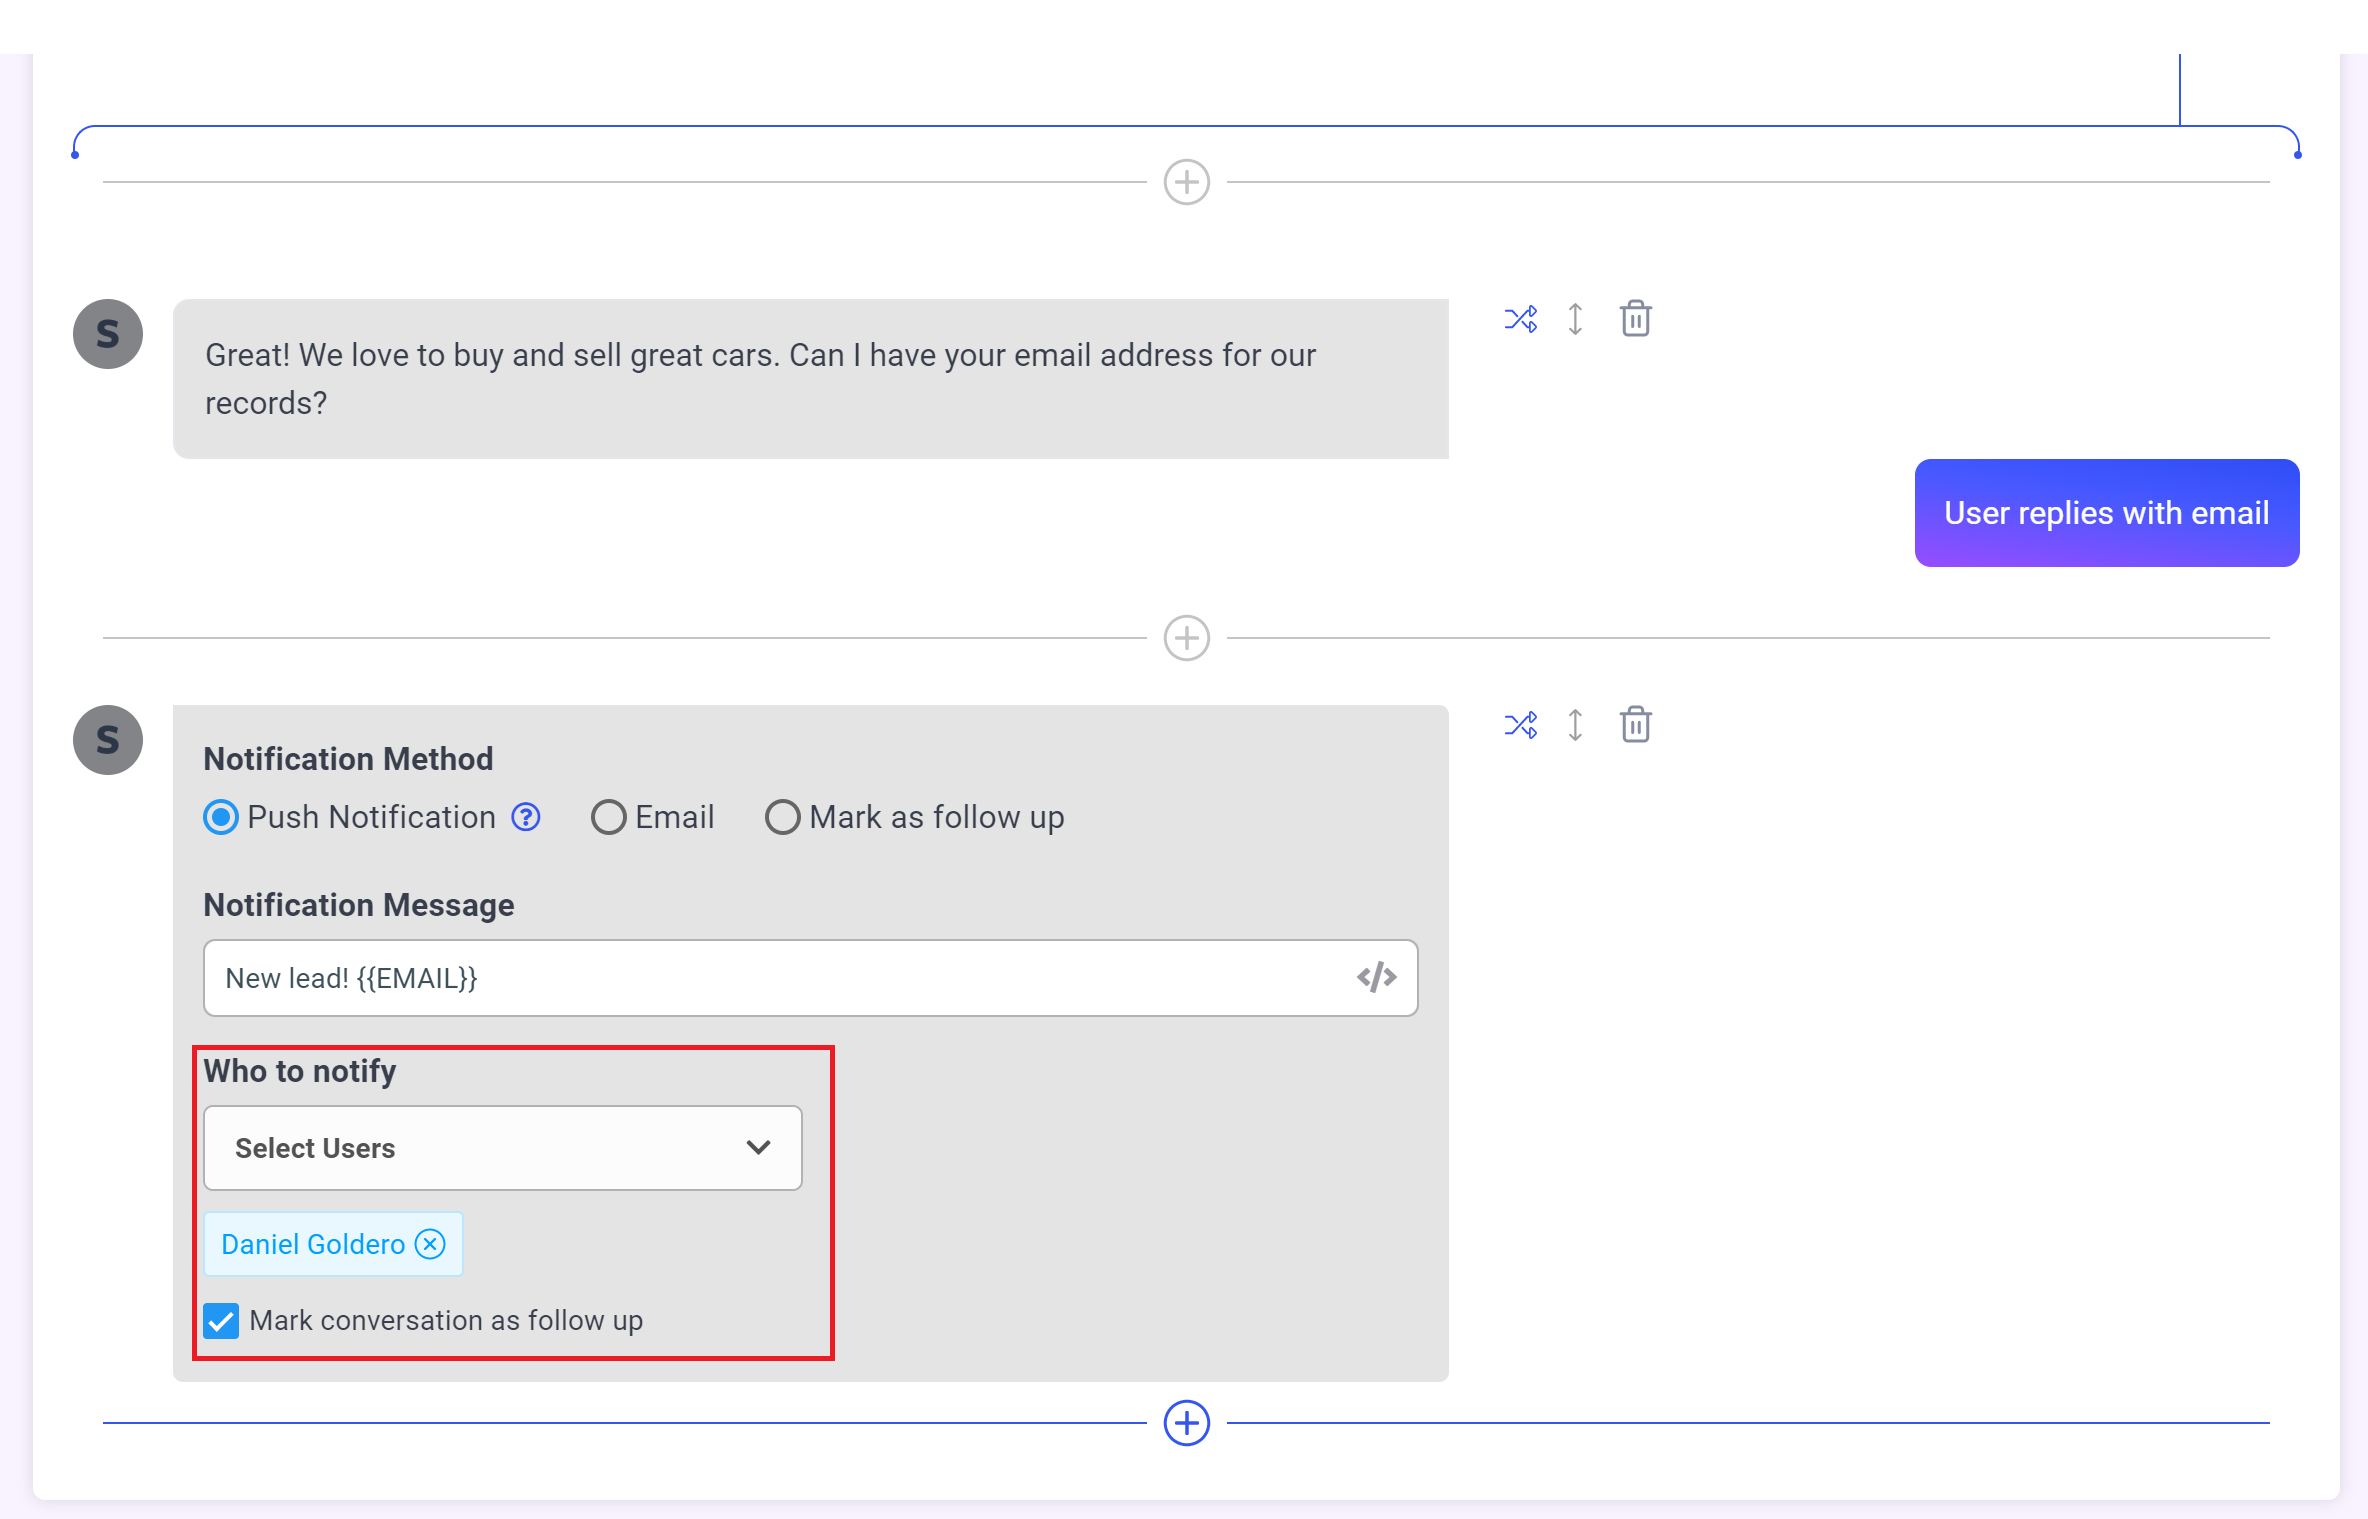
Configure your notification widget:
- A push notification can be sent to your Mobile App or Browser
- An email can be sent to multiple email addresses
- Always mark a conversation as follow up so it's easy to find in the inbox
Now that we have collected some data. Let's see how we can use it.
Let's say we want to send a follow up message within the first 24 hours to everyone who chose that they were interested in "Buying a Car".
All we have to do is go to our Audience located here:
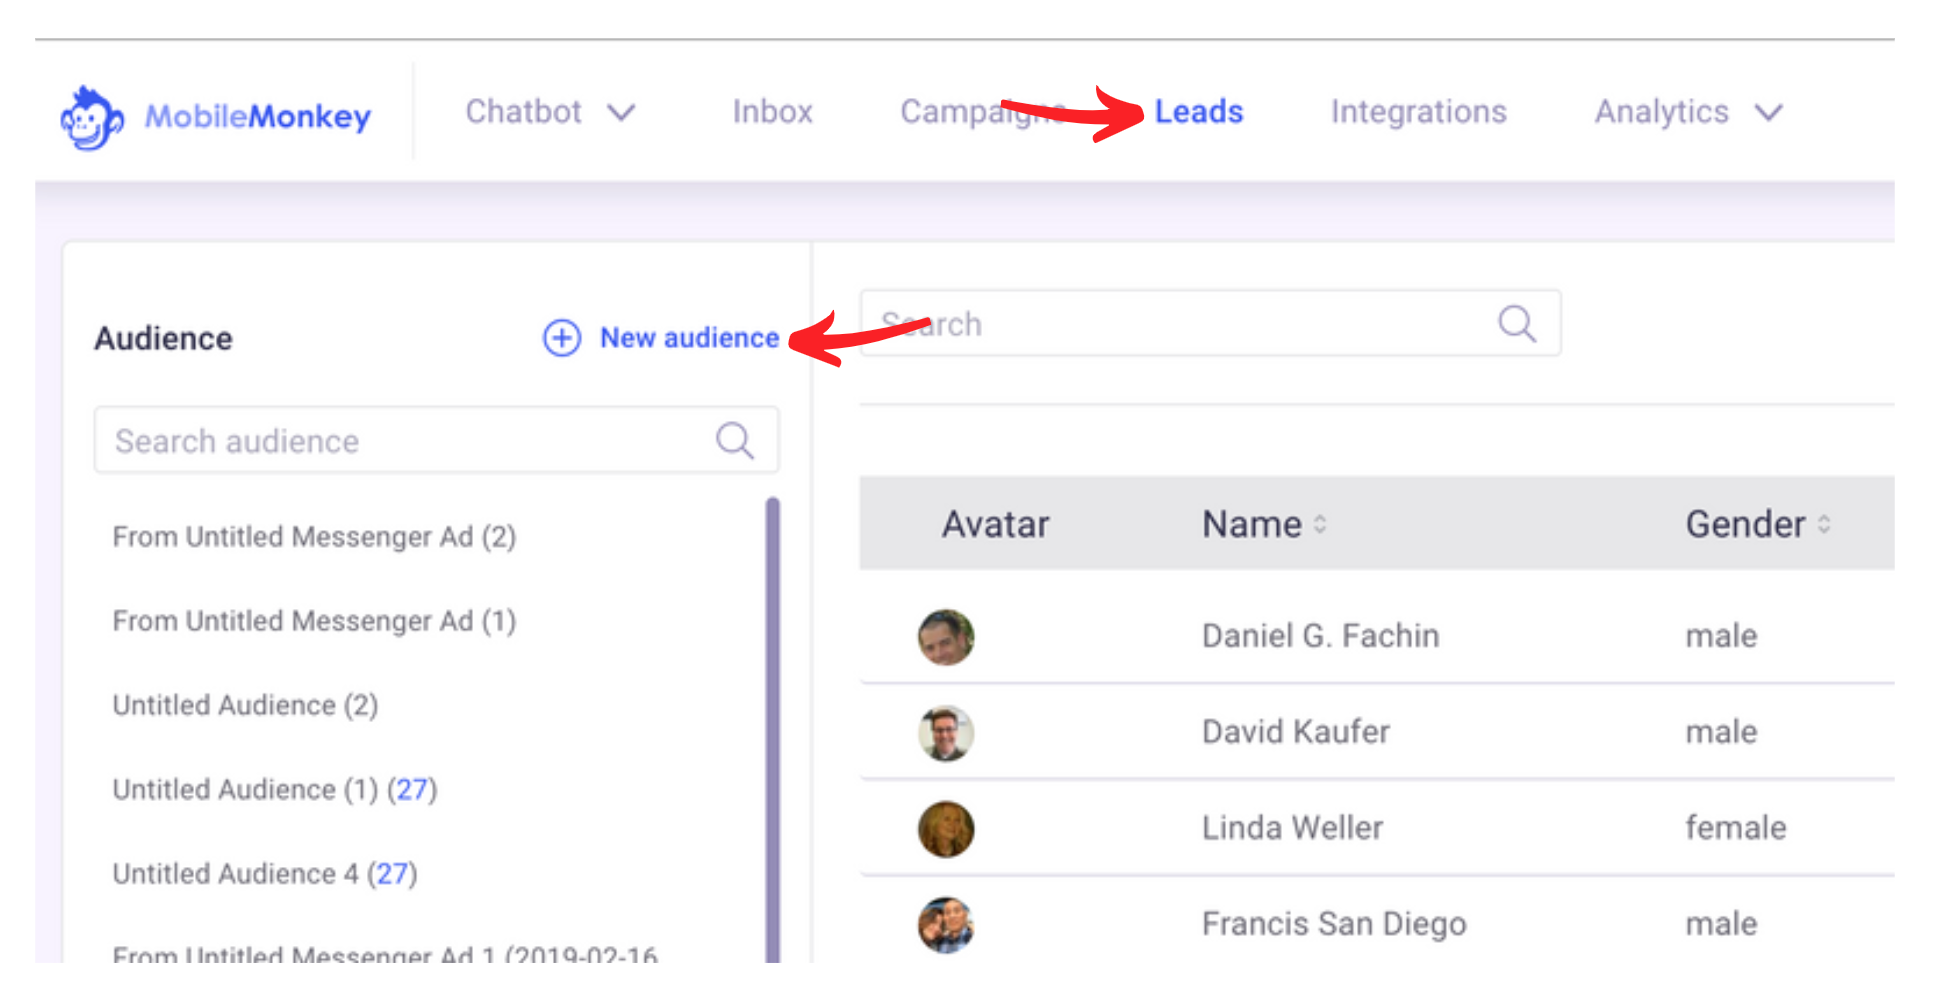
Now choose "New Audience" and you will see a panel slide out from the right side.

After you click "Add filter" you will be presented with the following options.
- Filter by tag - This will show you all of the tags you have added throughout your dialogues.
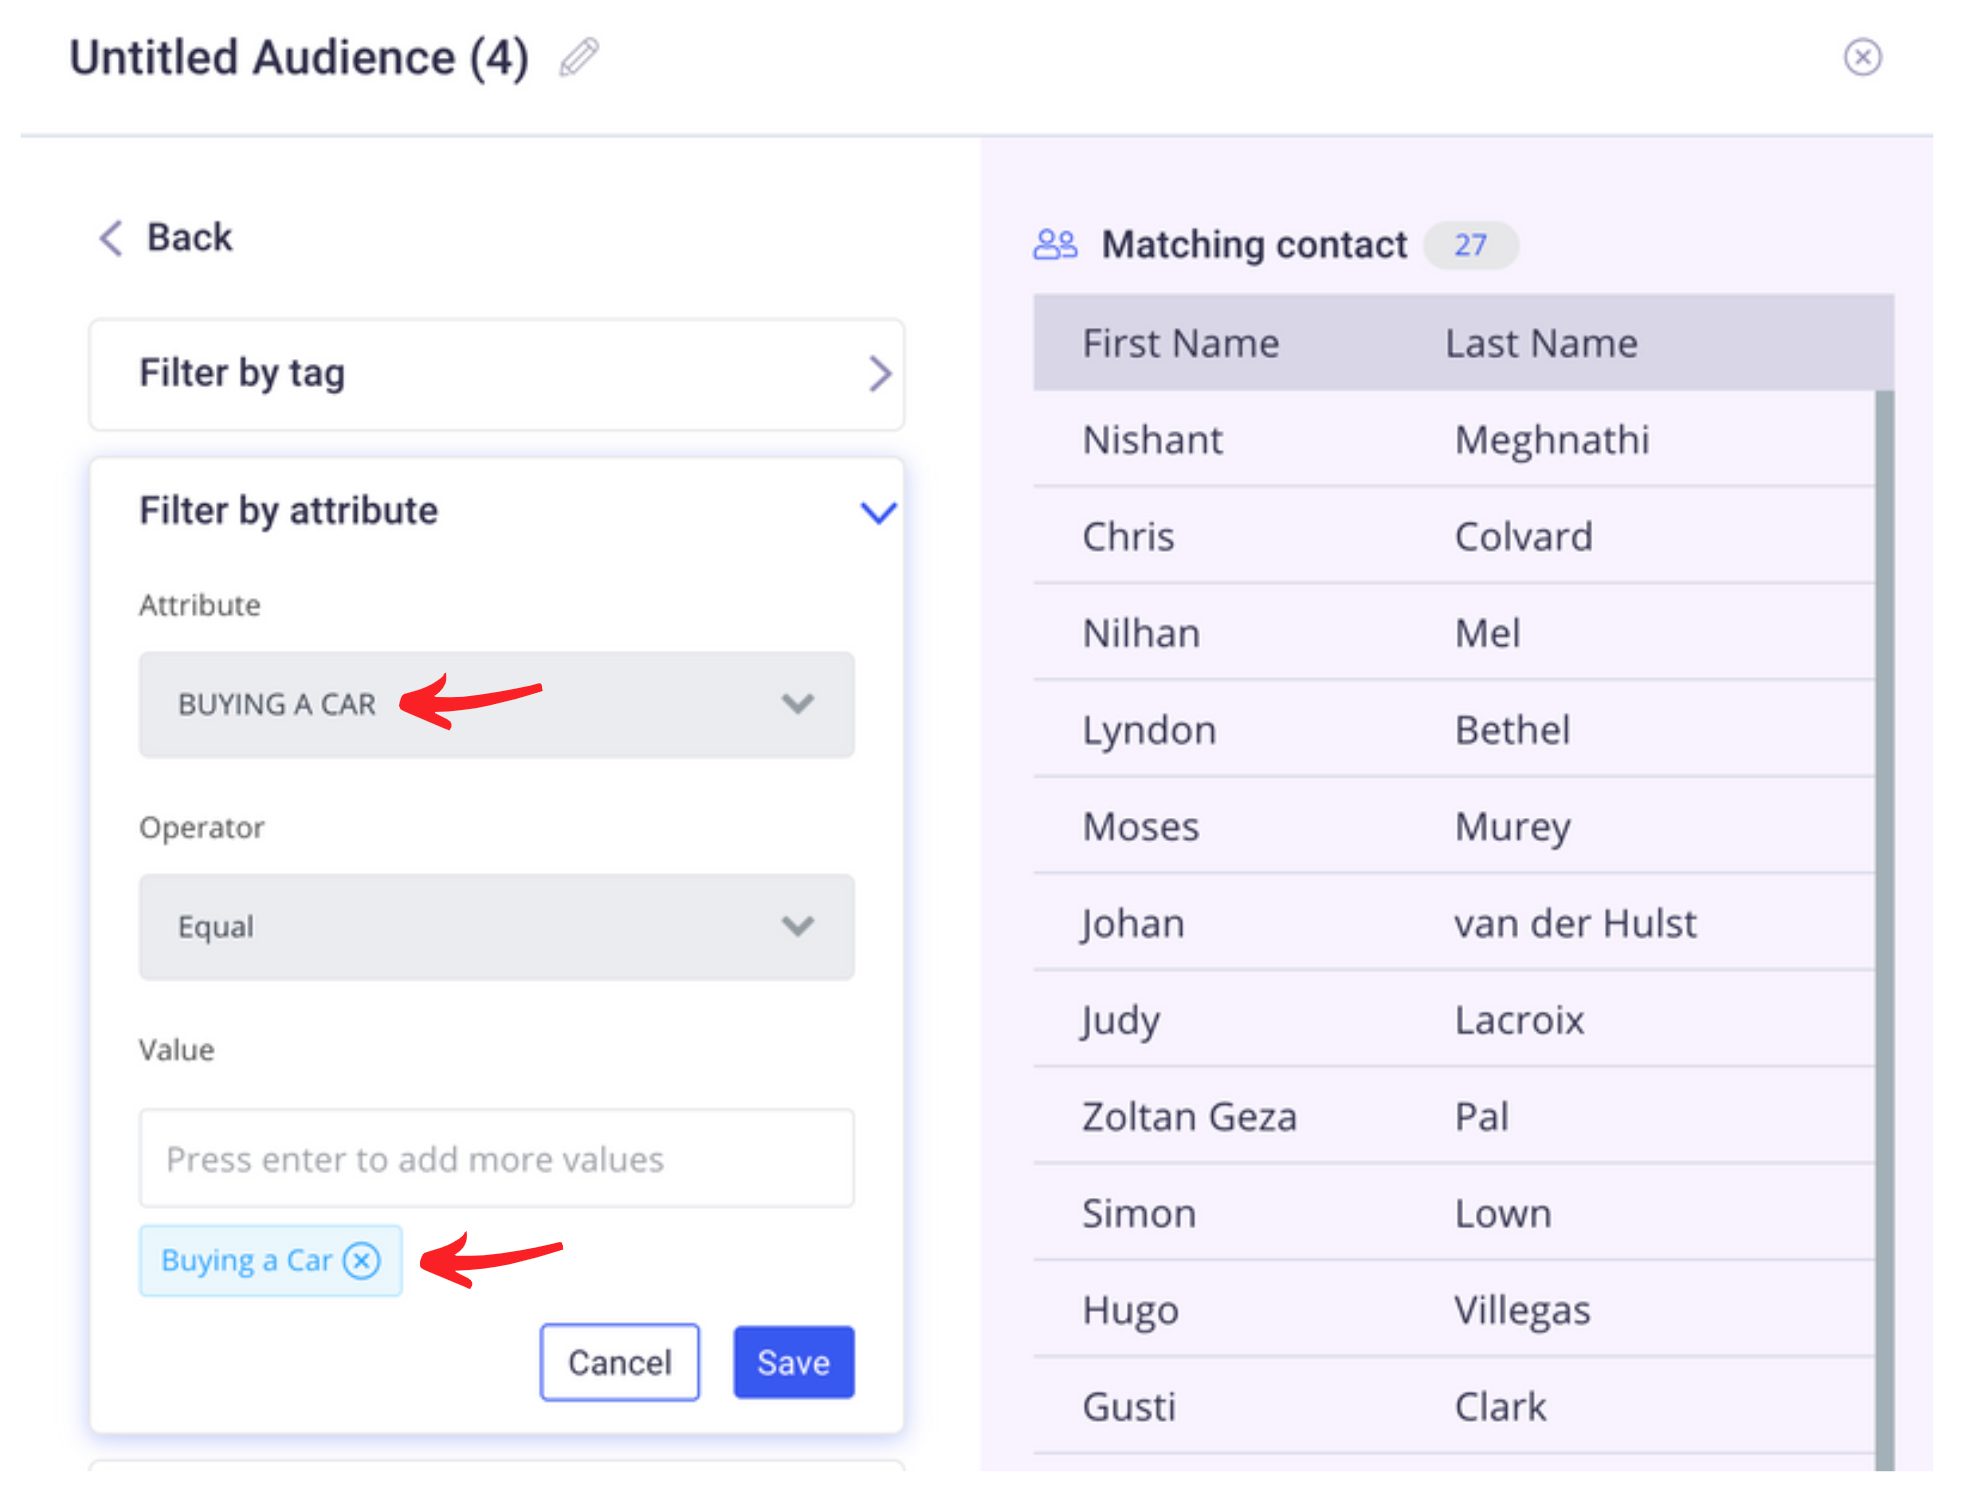
- Filter by attribute - This is where we will choose "Buying a Car" attribute.
- Filter by active within 24 hours - This will show you all the leads that have been active within the last 24 hours. If you don't know, Facebook only allows you to send "free" messages to contacts who have been active within the last 24 hours.
- Filter by Platform (You can choose one or all)
- Facebook Messenger
- SMS
- WebChat
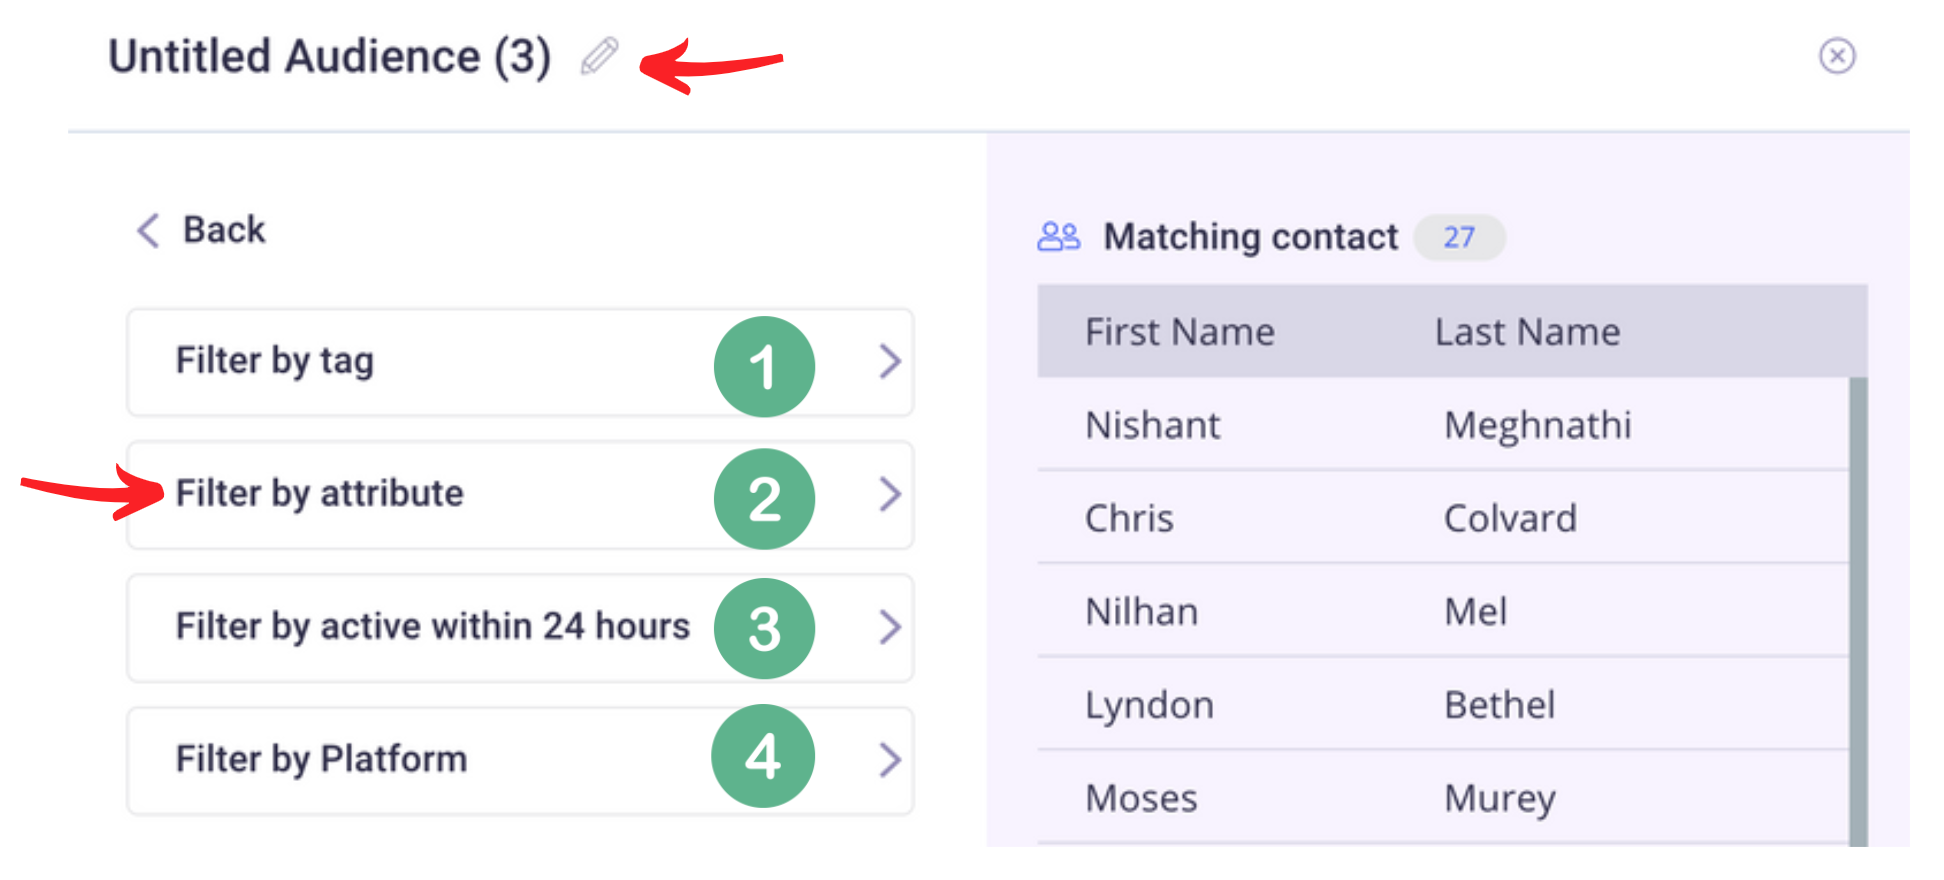
Choose the attribute "Buying a Car" and then type the value of "Buying a Car". Then hit save.
Now hit save and your audience is created. Now that you have this audience what can you do with it? There are a few things and we have listed them below.
- You can sync your audience to Facebook for retargeting
- Create follow up drip sequences
- Use our navigate widget to redirect your audience to another dialogue
- Send a sponsored message
We have help docs for all of these and more.