New Automation Builder
 Updated
by
Raquel Bartolome
Updated
by
Raquel Bartolome
The New Automation Builder allows users to have one single flow with multiple conversations sources (Input triggers). Watch the short video below to find out more on how to use this awesome Automation Builder!
Click on a specific Automation Stage below for more information ⬇️⬇️⬇️
Create an Automation and Choose One or More Input Trigger
1. Click on +Automation on the Dashboard. 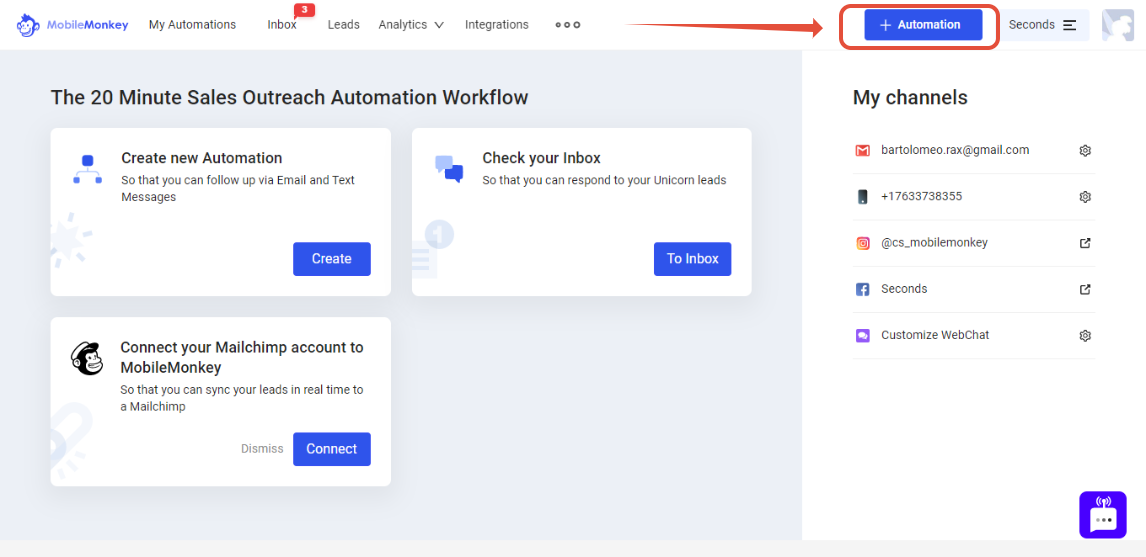 2.Click on +ADD TRIGGER. Take note that the default Input triggers (X-Ray Website Visitor & Manually upload contact list) are both INACTIVE.
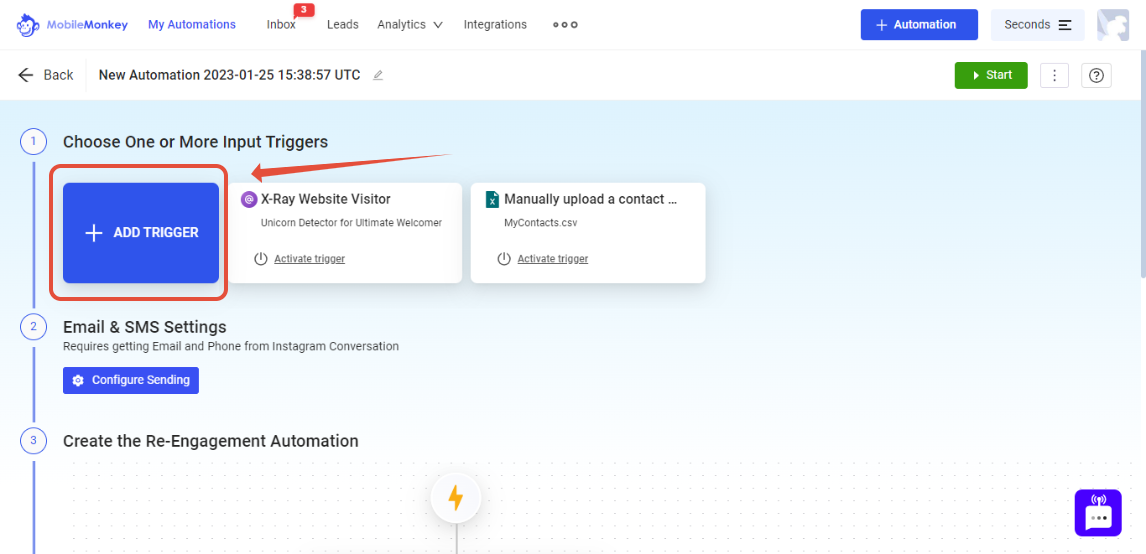 3. A list of Automation Input Triggers will appear and you can view triggers per channel (Facebook, SMS, Integration, Import Contacts, Webchat)
 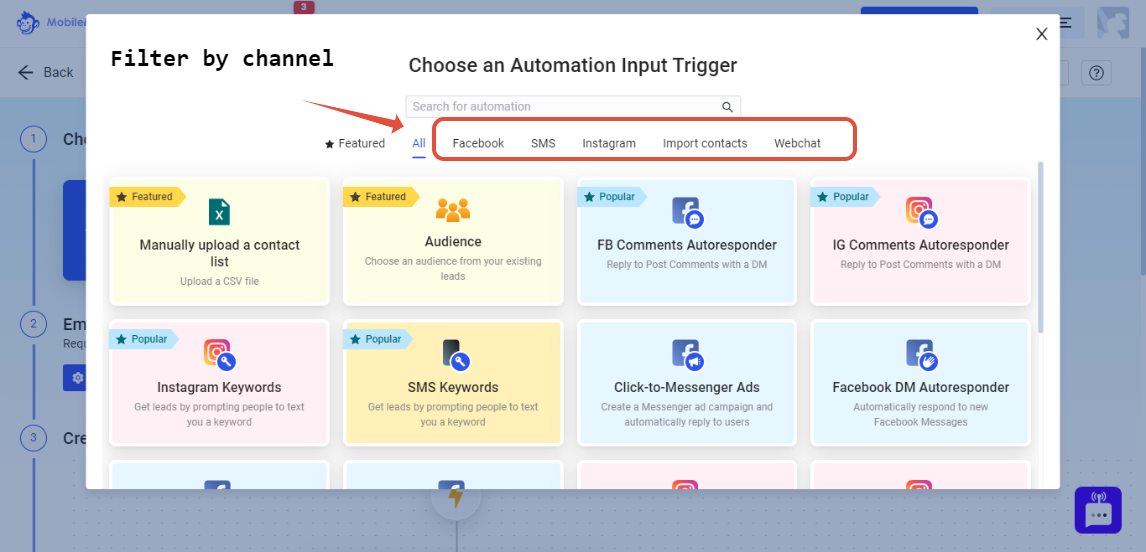 4. Select a specific Input Trigger from the list. You can add more input triggers later.
 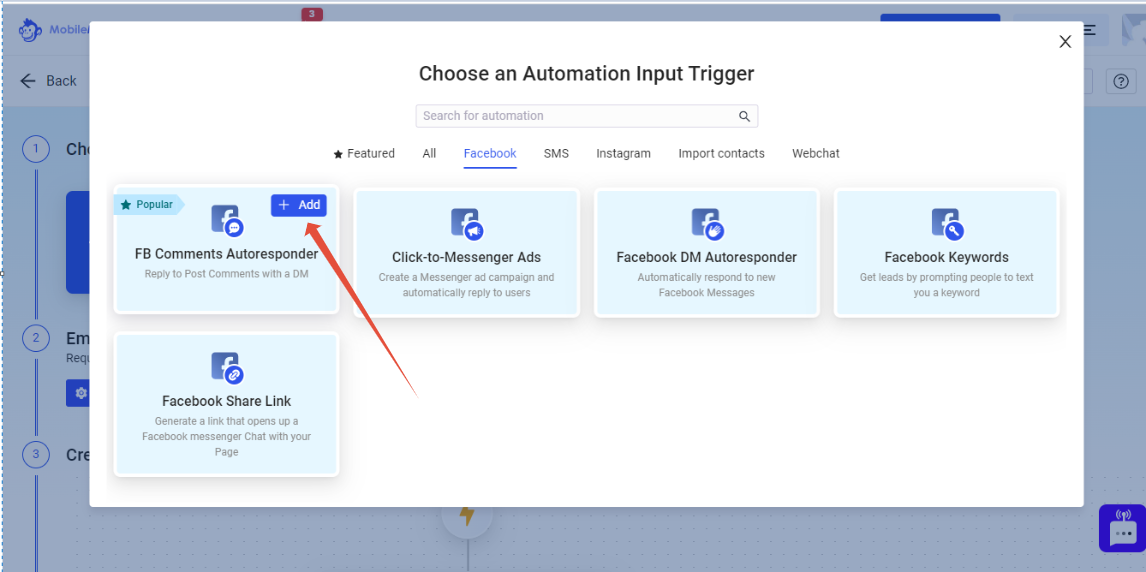 5. Select Create new to start with the basic conversation flow or data collection, then click on Let’s go. This can be edited later on the actual conversation dialogue flow.
 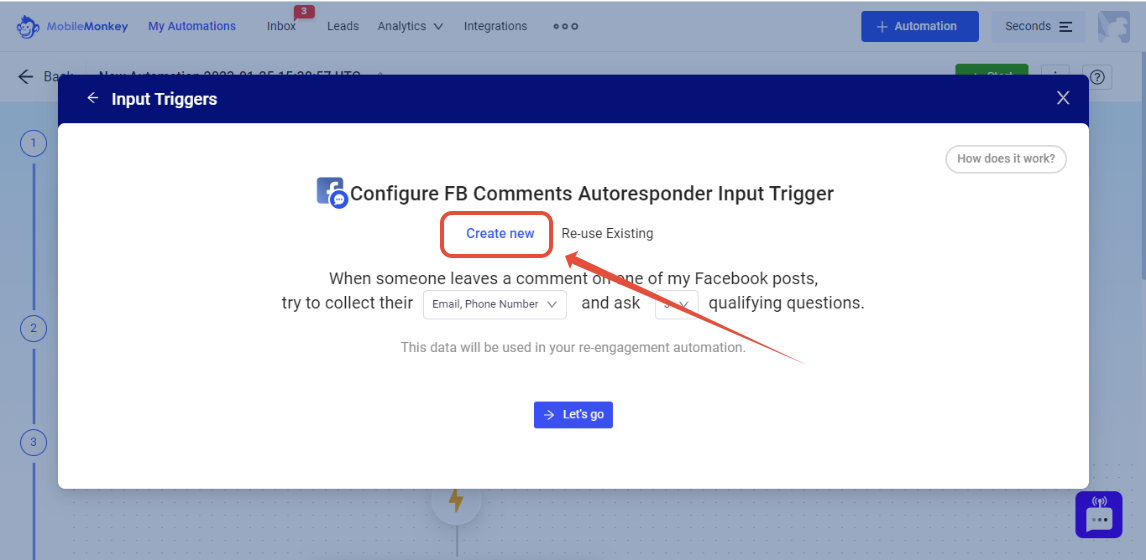 The "Re-use Existing" option will populate a list of Automations and the corresponding Input triggers under an Automation. Selecting an Input trigger will copy or 're-use' the exact conversation dialogue flow on the input trigger. Edits made to the new Input Trigger WILL affect the original and vice versa.
 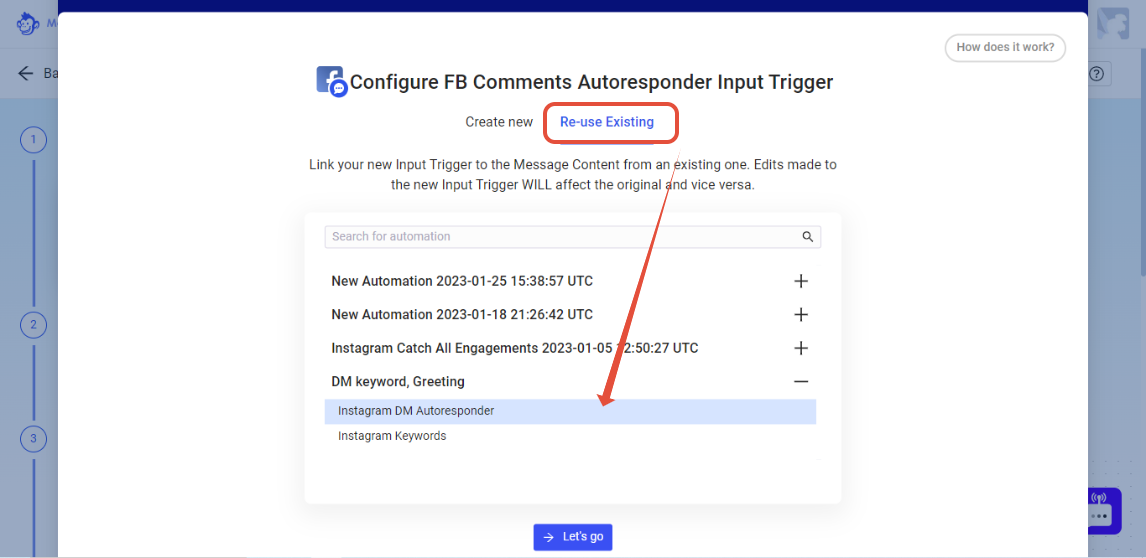 6. When you select Create New, you need to create your message content from scratch. You can check this article to know more about Dialogue-building and widgets.
 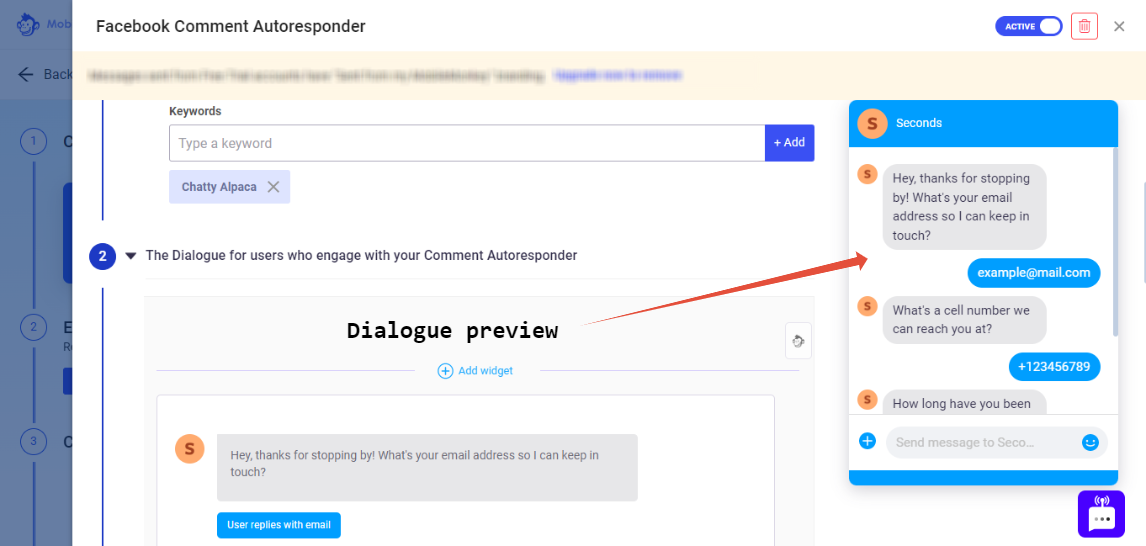 7. Your Input trigger/s will be displayed once created. Take note that you can enable/disable a specific input trigger in an automation or enable/disable an ENTIRE Automation.
2.Click on +ADD TRIGGER. Take note that the default Input triggers (X-Ray Website Visitor & Manually upload contact list) are both INACTIVE.3. A list of Automation Input Triggers will appear and you can view triggers per channel (Facebook, SMS, Integration, Import Contacts, Webchat) 4. Select a specific Input Trigger from the list. You can add more input triggers later. 5. Select Create new to start with the basic conversation flow or data collection, then click on Let’s go. This can be edited later on the actual conversation dialogue flow. The "Re-use Existing" option will populate a list of Automations and the corresponding Input triggers under an Automation. Selecting an Input trigger will copy or 're-use' the exact conversation dialogue flow on the input trigger. Edits made to the new Input Trigger WILL affect the original and vice versa. 6. When you select Create New, you need to create your message content from scratch. You can check this article to know more about Dialogue-building and widgets. 7. Your Input trigger/s will be displayed once created. Take note that you can enable/disable a specific input trigger in an automation or enable/disable an ENTIRE Automation. Email and SMS Settings
The Email & SMS Settings need to be set PER automation. Setting this up for one Automation WILL NOT make this the default settings NOR it will be affect existing & future Automations. 1. Click on Configure Sending. Take note that your Input trigger/s should be collecting AND saving Phone and Email information from your leads. 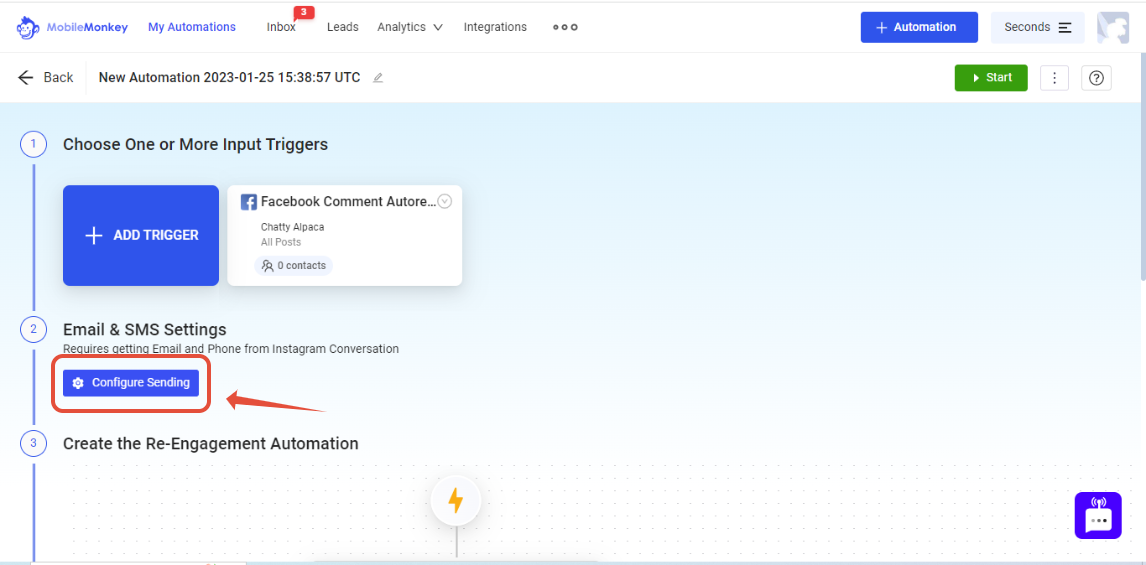 2. Select "Single" to select a single email address.
 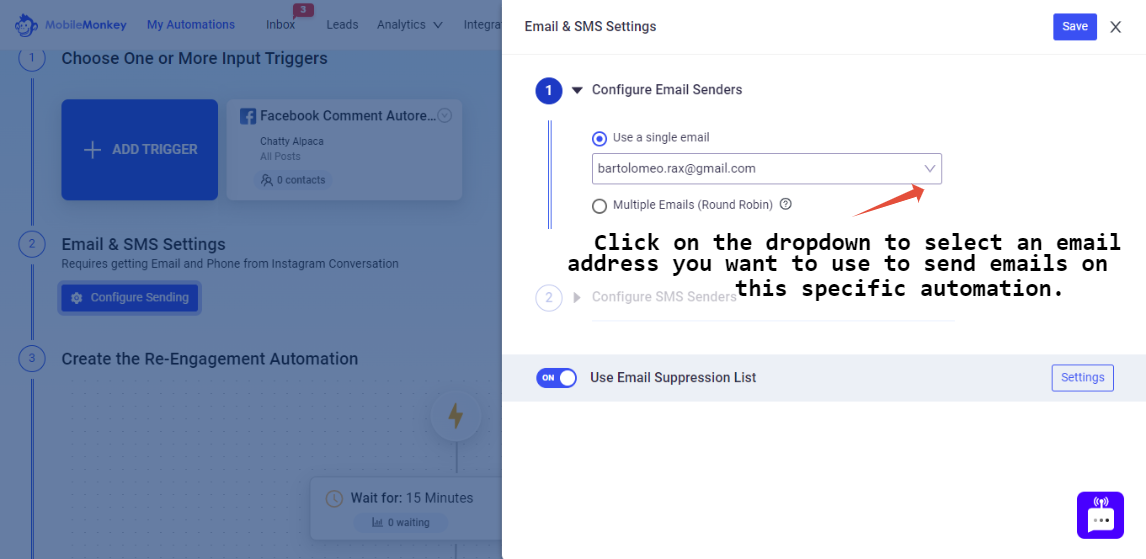 Select "Round Robin" to use multiple emails to send your re-engagement.
 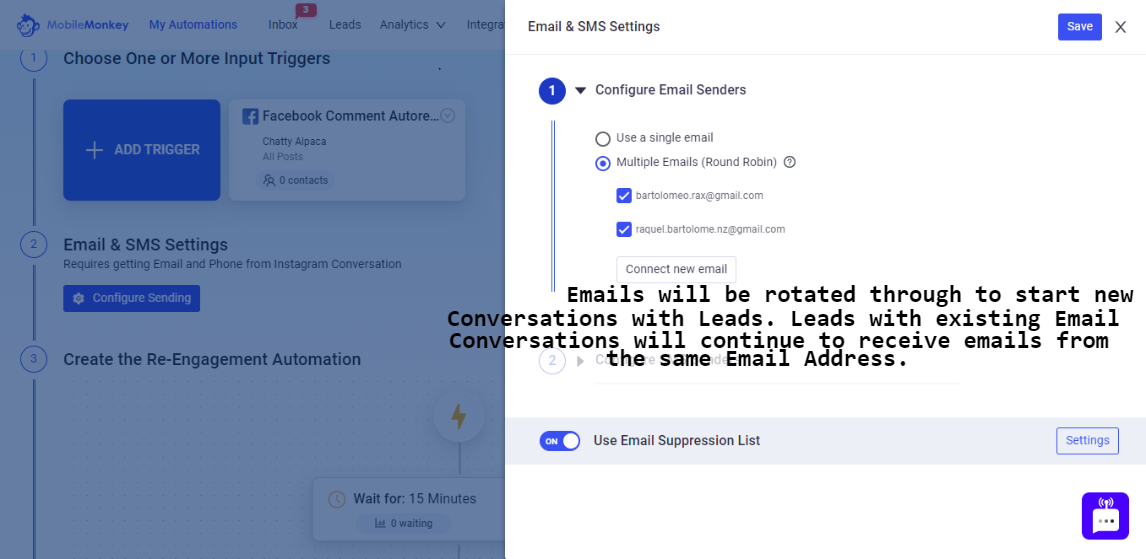 3. Do not forget to SAVE changes.
 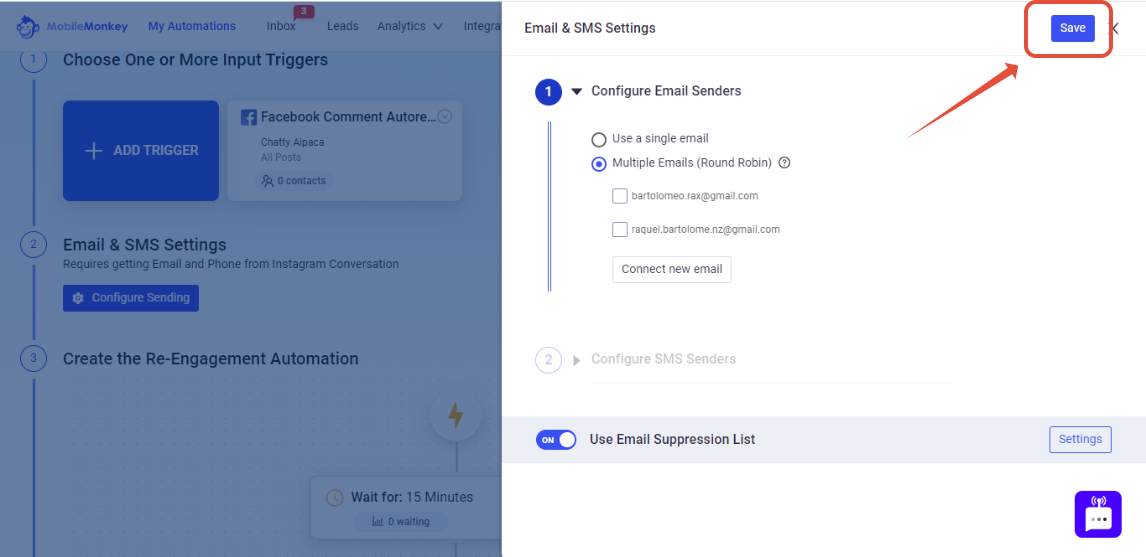 Please use this article to Enable Email Suppression List.
2. Select "Single" to select a single email address. Select "Round Robin" to use multiple emails to send your re-engagement. 3. Do not forget to SAVE changes. Please use this article to Enable Email Suppression List.Create the Re-Engagement Automation
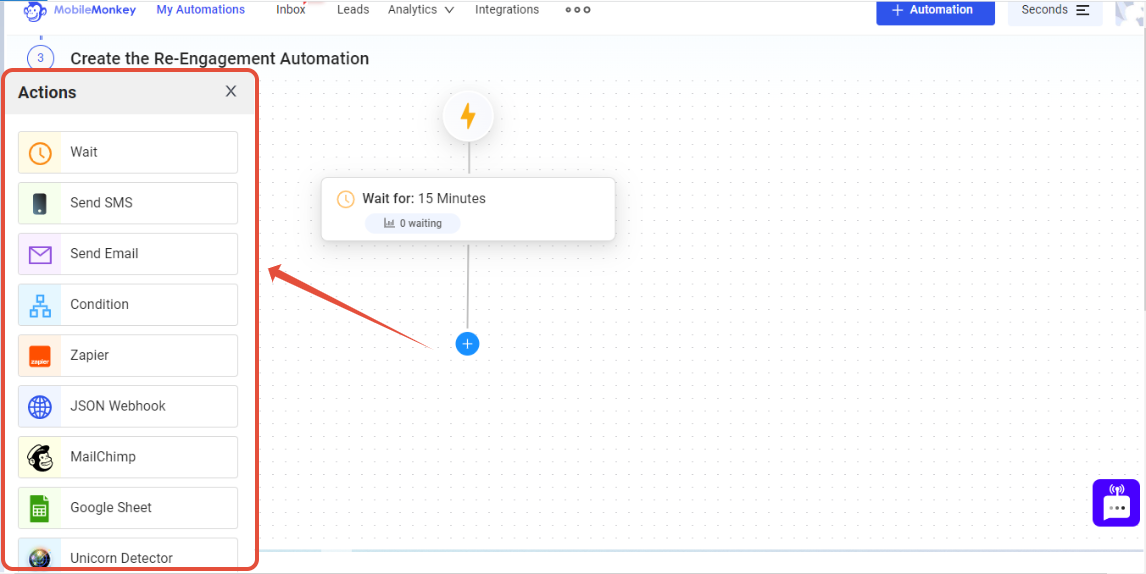
After a lead is captured, you can design a re-engagement automation using different actions like add a wait time, send lead information to Google Sheets and/or MailChimp, communicate with other CRMs using Zapier and/or JSON Webhook to add lead information or further customize the re-engagement flow by building condition/s or adding a Unicorn detector to optimize re-engagement via SMS and/or Email outreach.