
Using a Facebook Messenger chatbot for your website chat is a highly effective way to grow your contact list for Facebook Messenger marketing.
At the same time, your customers get instant answers and support in a mobile-optimized experience.
Today I’m going to show you how to add a Facebook Messenger chat widget to your website in three easy steps using Google Tag Manager.
You can use Customers.ai’s free chatbot builder and these Facebook Messenger templates with Google Tag Manager to add a Facebook Messenger chat widget to your site no matter what platform it runs on — including CMS platforms like Joomla, Magento, Shopify, WordPress and more. We’ll use a WIX website to illustrate.
(For another way to add a Messenger chat widget to WordPress site check out this tutorial.)
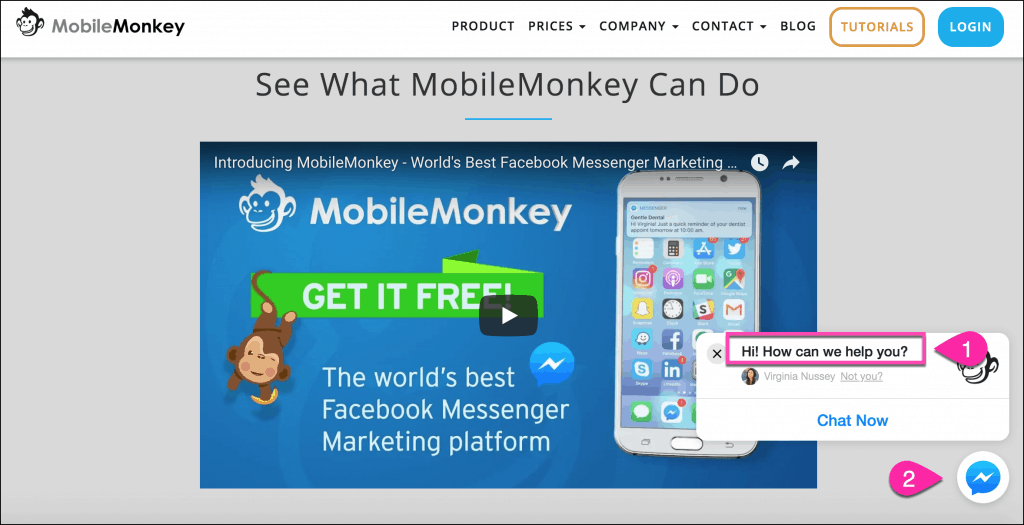
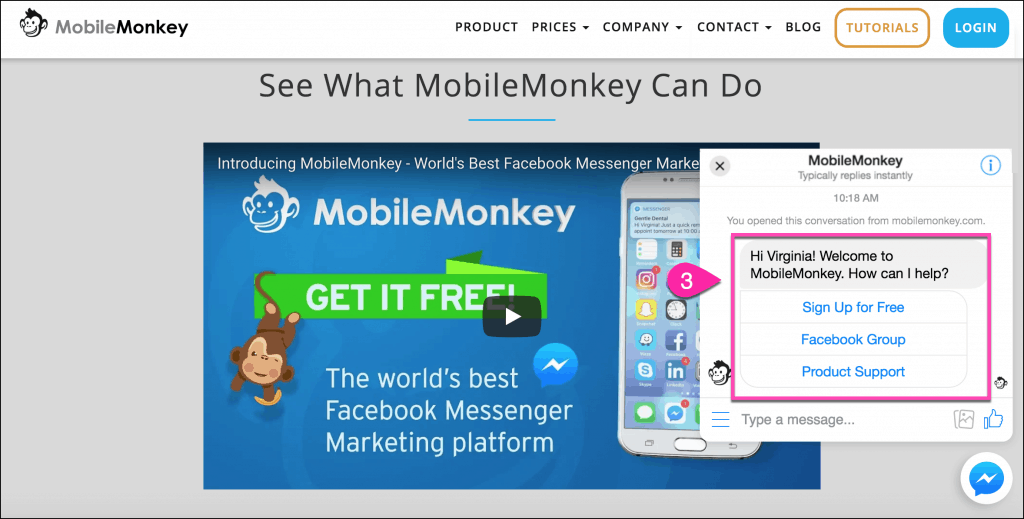
You can interact with Customers.ai’s website chatbot marketing widget by clicking the Messenger logo in the lower right corner of this window, or any other page of the site! Then build your own free chatbot with Customers.ai.
3 Easy Steps to Add a Facebook Messenger Chat Widget Using Google Tag Manager
Google Tag Manager is a free tool that lets webmasters quickly and easily add snippets of code, or “tags,” to a website.
In a single container controlled from the Google Tag Manager interface, you can manage tags you might need for a variety of reasons, from analytics tracking to a website chat widget, without the help of an experienced developer.
So how can you add Facebook Messenger chat to a WIX website? With Google Tag Manager! Just:
1. Install Google Tag Manager on your website.
2. Set up your website chat widget in Customers.ai.
3. Create a new tag for your customer chatbot in Tag Manager.
Ready? Go!
1. Install Google Tag Manager on Your Website
First, head to Google Tag Manager and either create an account or log in to your existing one.
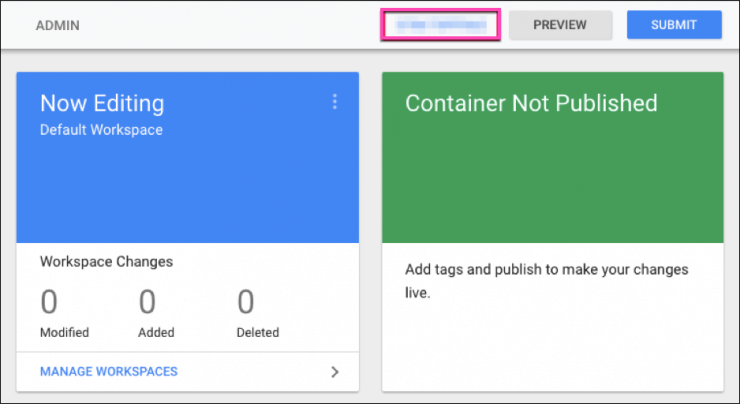
Once you’ve created your account, copy the ten-digit ID from your Tag Manager dashboard. This ID is located at the top of the page in blue text:
This next part will vary slightly based on your CMS, but the process of adding integrations is similar for most CMS platforms.
Log into your WIX account and navigate to “Marketing Integrations”.
Find the integration for Google Tag Manager and click “Go For It.”
Then, select “Connect Google Tag Manager,” paste in your ID and click “Save”.
If you’re using a different CMS and aren’t sure how to enable Google Tag Manager, search your CMS provider’s website for instructions for adding third-party integrations in Google or YouTube, or get in touch with their support staff to help you out.
2. Set Up Your Website Chat Widget in Customers.ai
Once you’ve installed Google Tag Manager on your website, you’ll need to connect your Facebook Messenger chatbot to your domain.
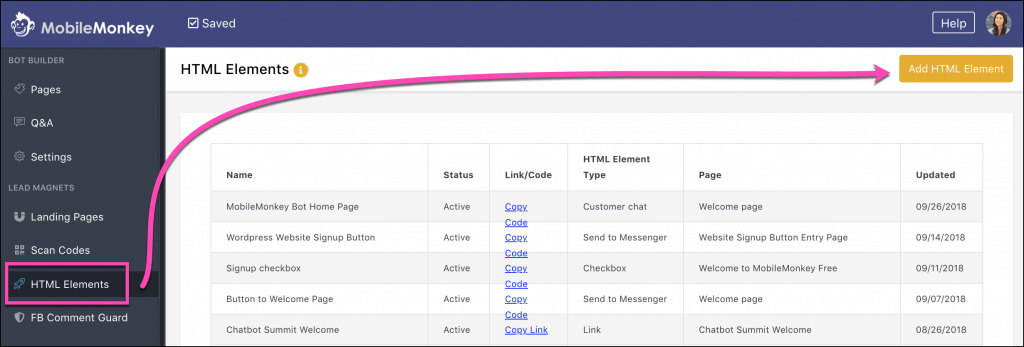
In Customers.ai, select “HTML Elements” from the left sidebar and click the button to “Add HTML Element”:
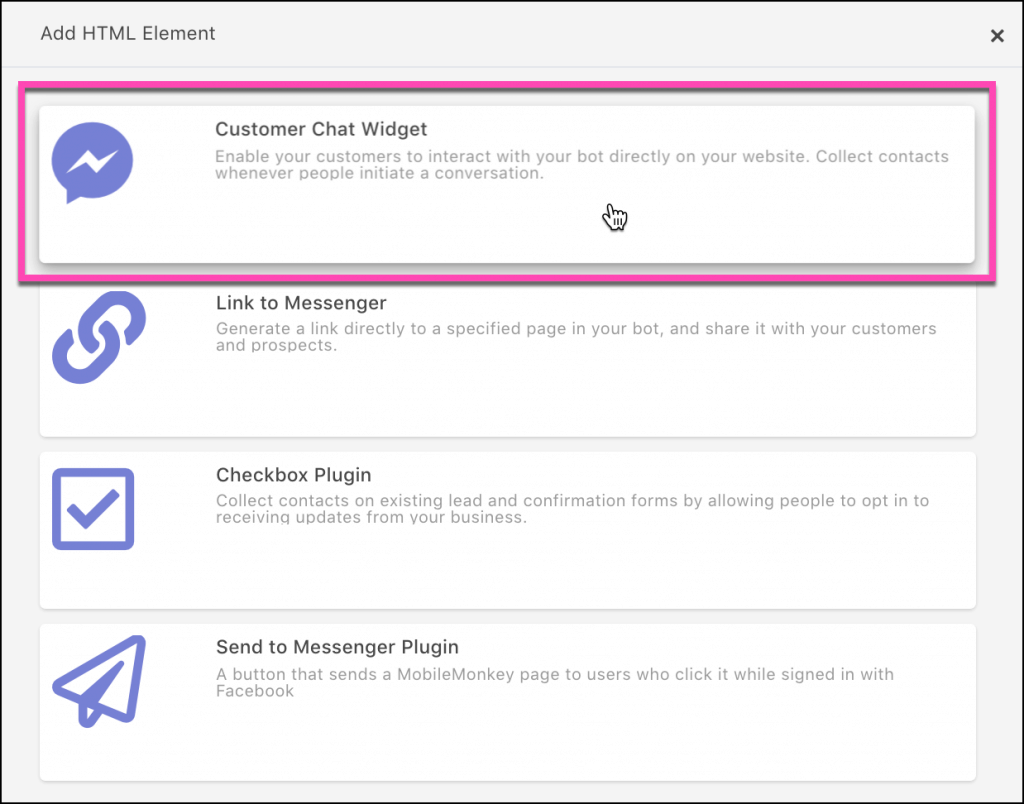
Select “Customer Chat Widget” from the options:
Give your customer chat widget a descriptive name so you can recognize in a listing of all your Customers.ai Messenger HTML elements. “[Domain Name] Website Chat” is a good name, for instance.
Because you can add different bots to different pages of your site, you might design a different bot for blog than your shopping cart.
Keep these things in mind when you’re giving your website chat widget a name.
Next we’ll pick all the chat widget settings including:
1. The text on the chat widget box
2. The color of the Messenger icon
And when someone clicks “Chat Now”:
3. The chat page that responds to a user
A closer look at these three selections to customize…
Text on the chat widget box
To customize the text on the chat widget box, enter text here in Customers.ai:
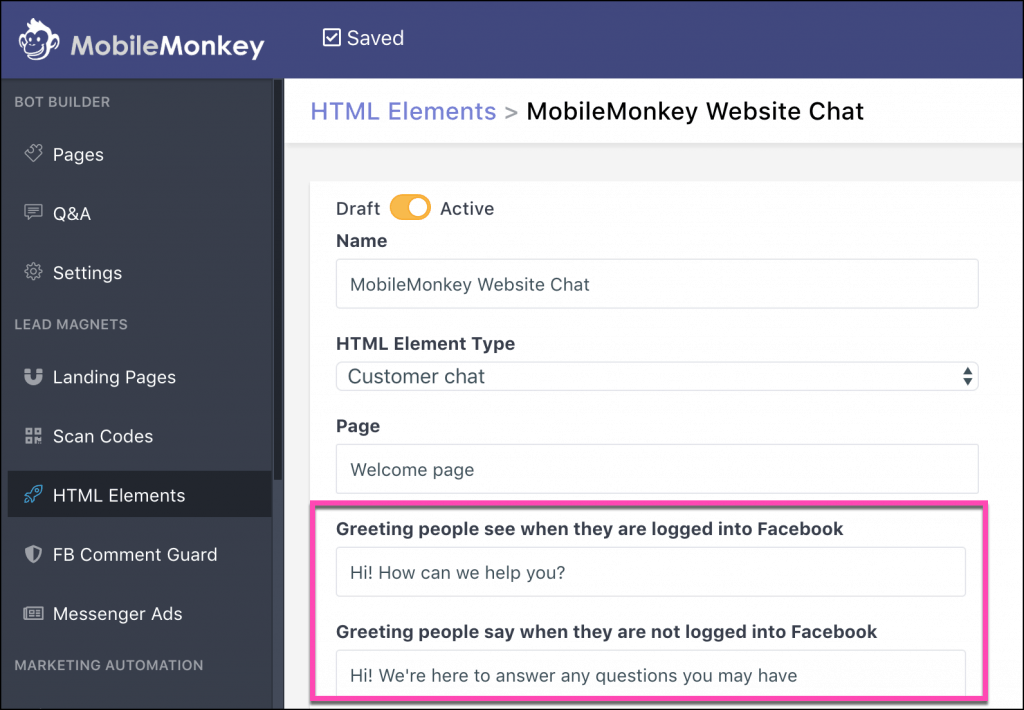
You can say something different to someone who is logged into Facebook and someone isn’t logged into Facebook.
Messenger icon color
Want to customize the color of the Messenger logo that appears in the lower right corner to match your site theme?
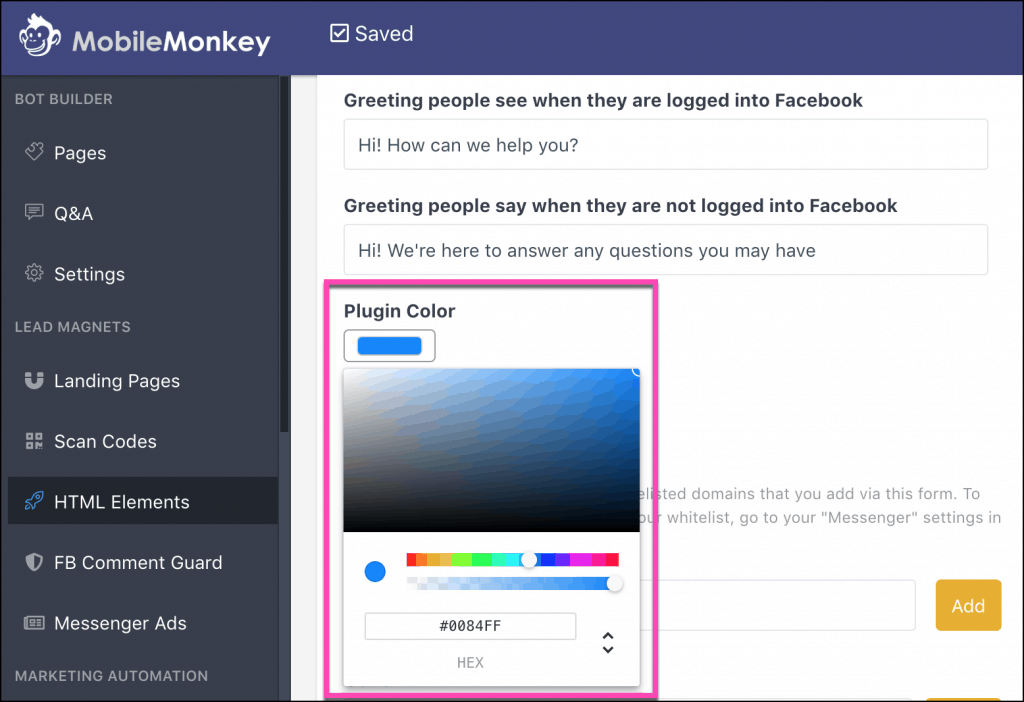
Enter the hex color code of any color into the Plugin Color field!
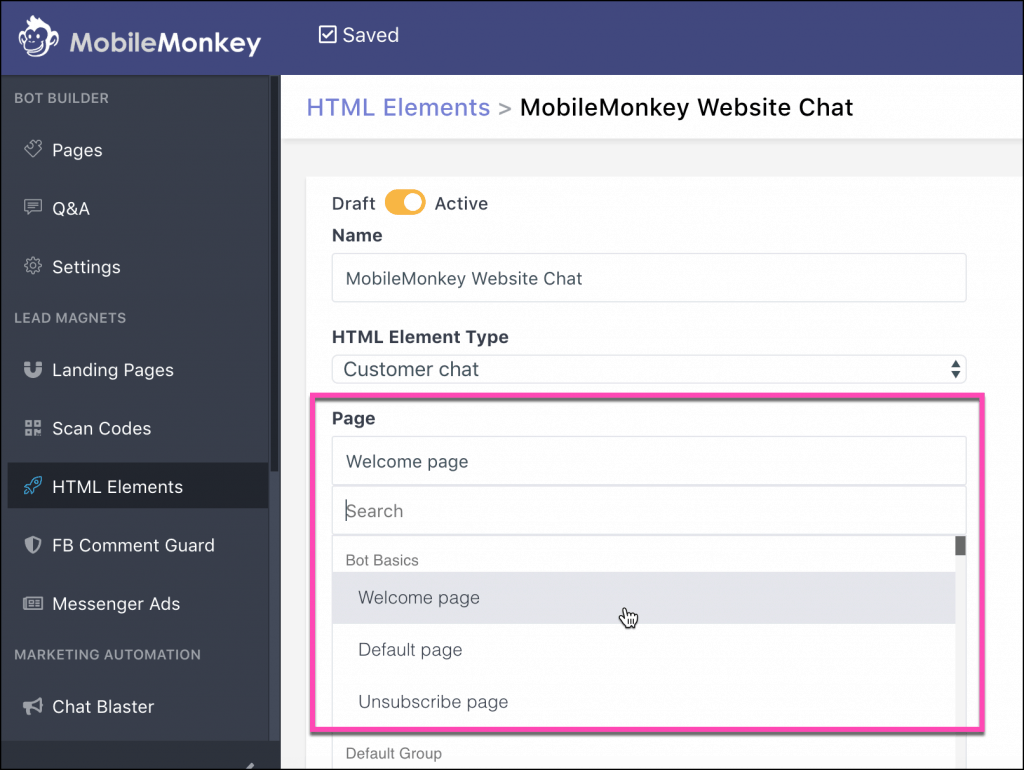
Chat page that responds to the user
What will your bot say when the user clicks “Chat Now”?
By default, your Welcome Page bot is selected. But you can use the drop-down selector to pick the chat page that responds to your website visitors.
Here’s a quick primer on how to build a chatbot page in Customers.ai.
Use your standard welcome page bot or design a bot to greet your website visitors. Help a user out!
Next white list all the domains you’ll be using this website chat widget on.
Under “Add Domain to Whitelist,” enter your domain name, like https://domain.com, and click “Add.”
With all the settings customized, click the “Copy” button to paste the website chat widget code to your clipboard:
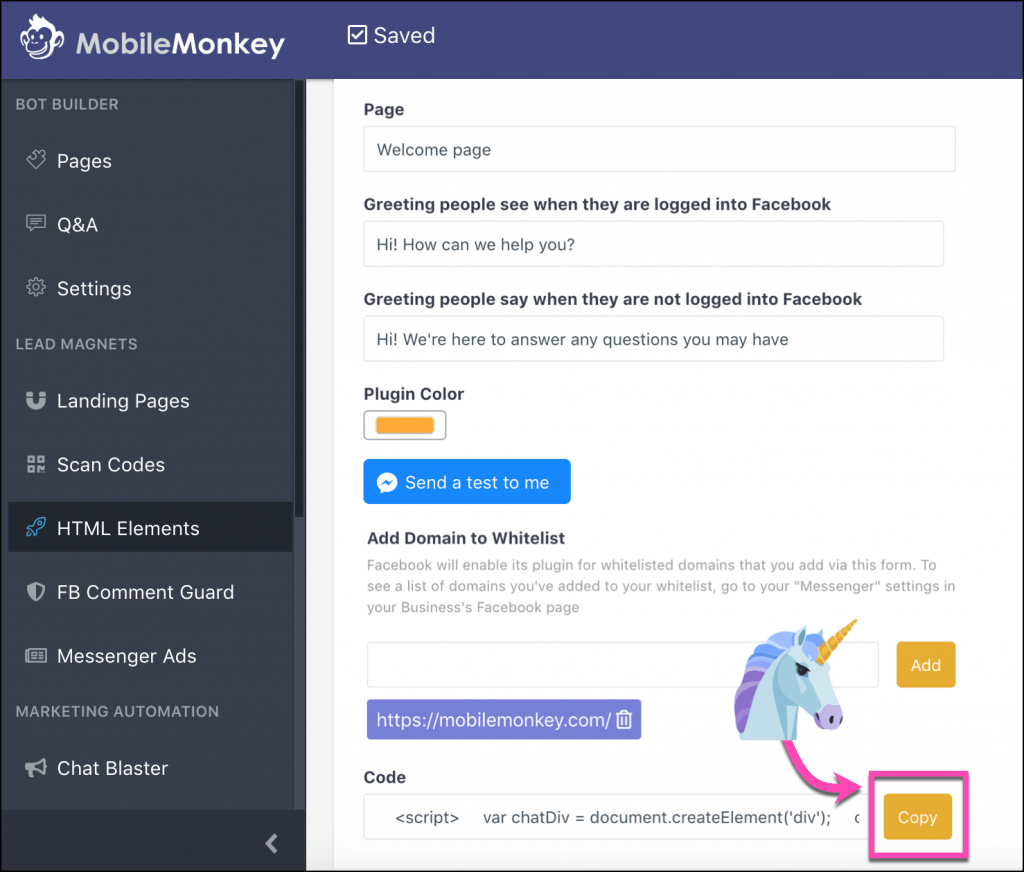
This is what we’ll add to Tag Manager next.
3. Create a New Tag for Your Chatbot in Tag Manager
Head back to your Google Tag Manager dashboard, and click “Add A New Tag”:
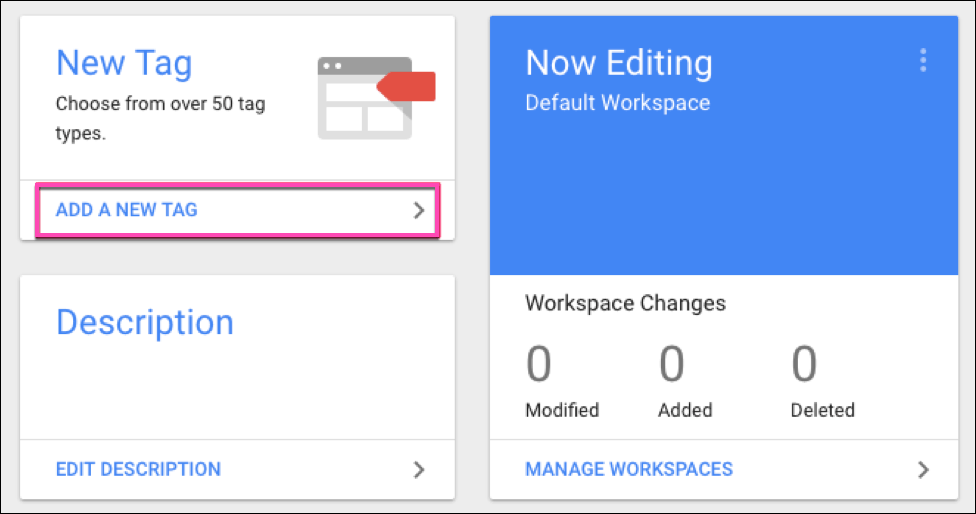
Give your tag a descriptive name like “Facebook Messenger Chatbot Widget.”
From the tag type menu, select “Custom HTML”:
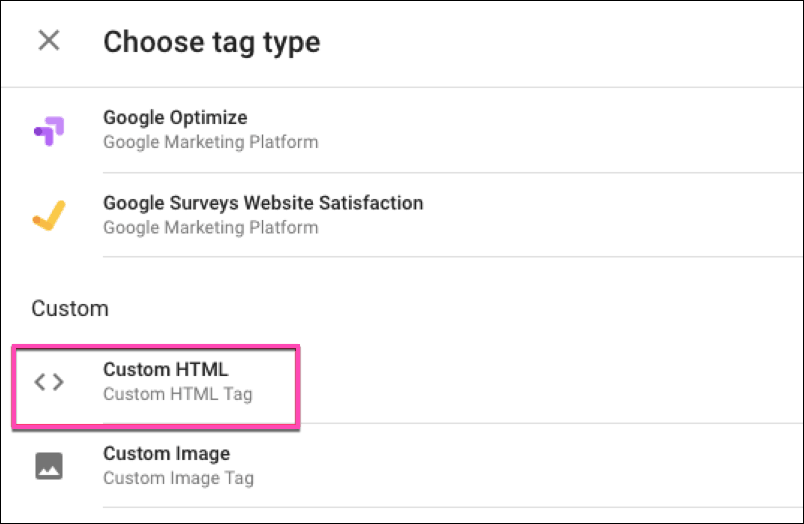
An empty text box will appear. Paste the code you copied from Customers.ai into this box.
Then under “Triggering,” select “All Pages” to tell Google Tag Manager to deploy your chatbot widget on every page on your site:
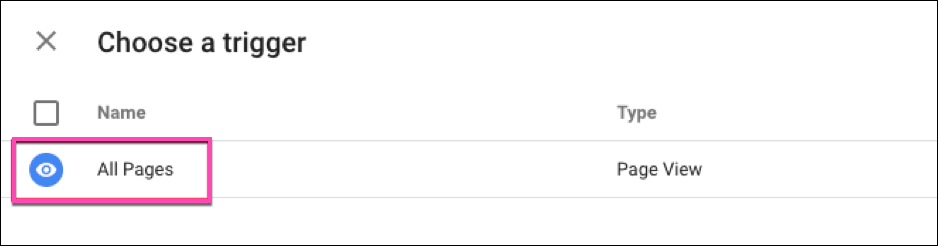
And if there are pages on your site where you don’t want your chatbot to appear customize the triggering settings.
Click “Save” and your chatbot widget will be live on your website!
Here’s our quick video tutorial on installing a Messenger chatbot to your site through Google Tag Manager:
Adding a chatbot widget to your website is an excellent way to help your site visitors find what they need AND BECOME NEW MESSENGER CONTACTS who you can send hyper-relevant and personalized follow-up messaging to!
How to Add a Facebook Messenger Chat Widget to Your Website: Next Steps
Important next steps: