Website Chat Widget Input Trigger
 Updated
by
Raquel Bartolome
Updated
by
Raquel Bartolome
STEP 1. Install Website Chat
The first thing you want to do is choose which channel/s you want to support on your website chat widget: Facebook only, webchat only or OmniChat. If you have a Facebook page connected, your website domain must be whitelisted with Facebook. What website editor are you using? Once you select a website editor, an Installation guide will be provided. You can share this with your web developer if you aren't able to do it yourself. Finally you want to copy the code and place it on your website or have your web developer do it. If your chat widget is not showing up on your website, use our Troubleshooting tool to see what might be wrong. Proceed to STEP 5. 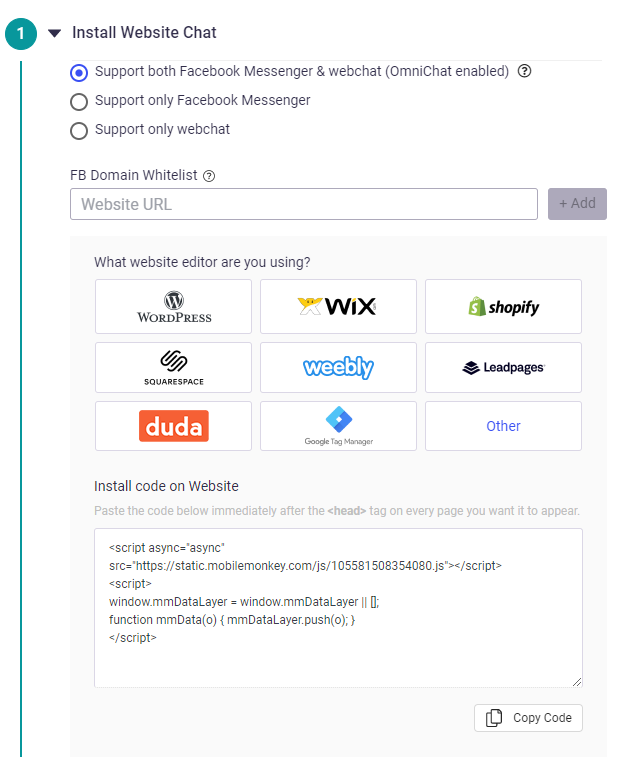
STEP 2. Reply Instantly to users who send a message to your Chat Widget
You can use the Navigate widget to select from your existing dialogues or create a new dialogue on this section. All the widgets you normally use to create a dialogue are available here.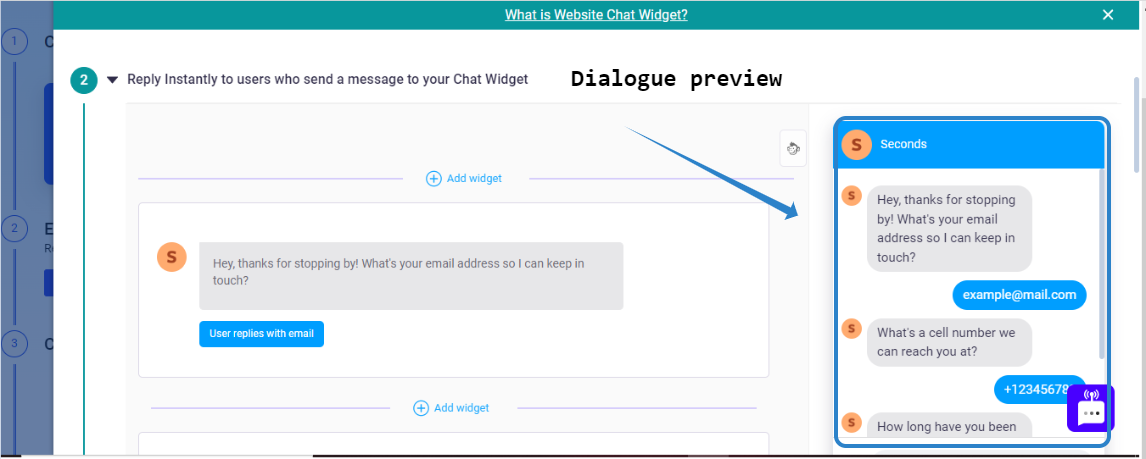
STEP 3. Edit Chat Icon and Greeting
Customize your Icon's shape (Square or Circle), Position (Left or Right) and Color to match your website's theme. The messenger greeting is when a user is logged into messenger. You can control what the message says when the user is logged in and when they are not. You can customize the appearance of the website widget in even more detail. Just click the edit icon, or do nothing to keep the default style. Lastly, the Interactive Settings controls the behavior of the Chatbox itself. 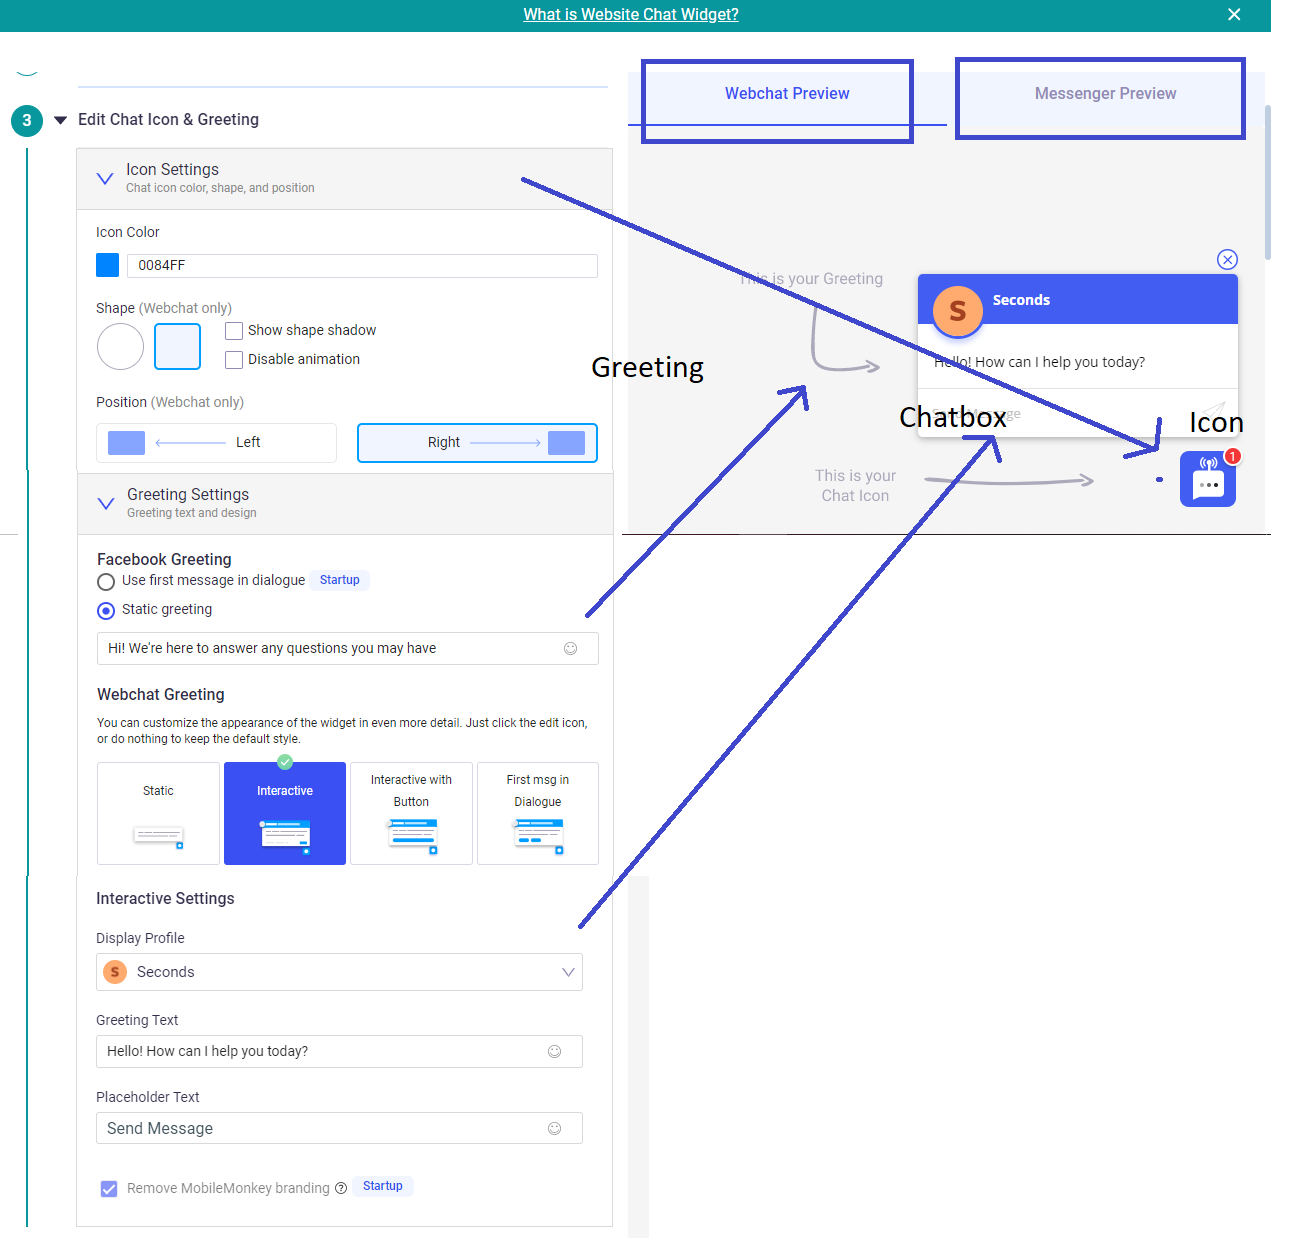
STEP 4. Edit Display Rules
a. You can choose if you want your greeting to always show always hide or pop up after so many seconds. We suggest trying each one to see which one your users respond to best. 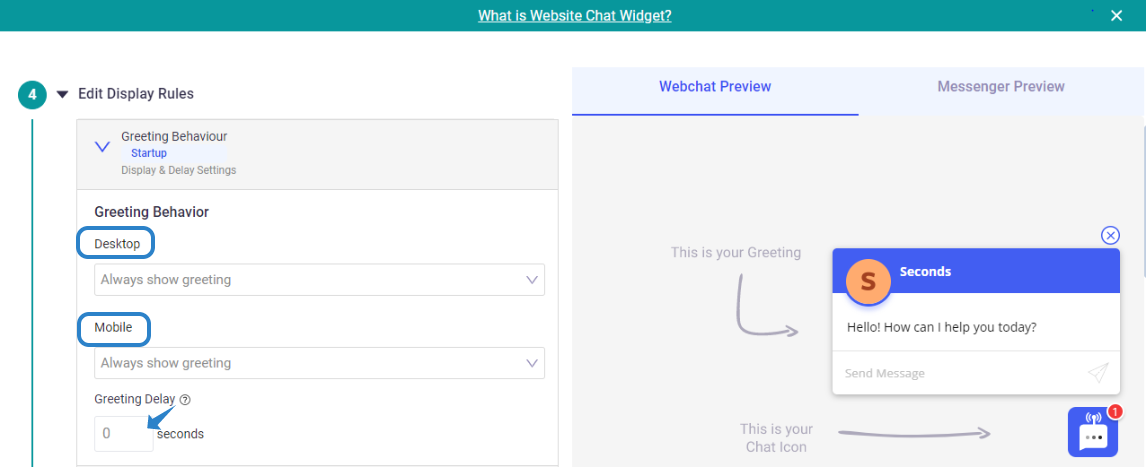 b. You can specify which pages this chat widget will display. This allows you to personalize the conversation based on which web page your users are. For example, I just want to show this chat widget to users on by blog. Therefore, I will change the operator to "contains" then, set the URL to mobilemonkey.com/blog/. In fact, this can be as simple as /blog as long as the code is installed on your website.
 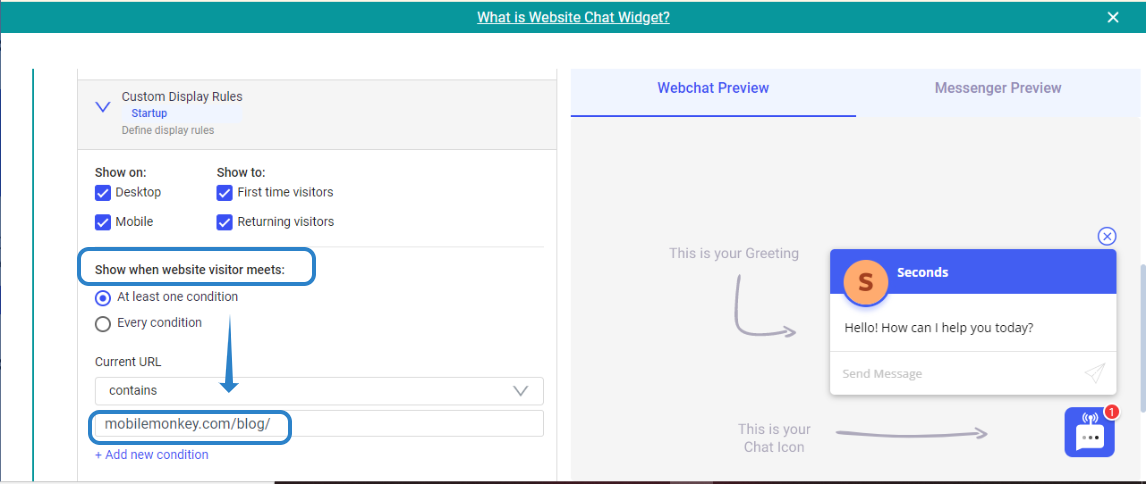 c. If you are on the Startup, Agency or Team custom plan, you can send custom data into your website chat widget. When our Javascript is loaded, we will be able to read any tag or attribute data set by your website and set it on the website visitor's contact record after they engage with the chat widget. This will require some technical implementation on the website. More details on this article.
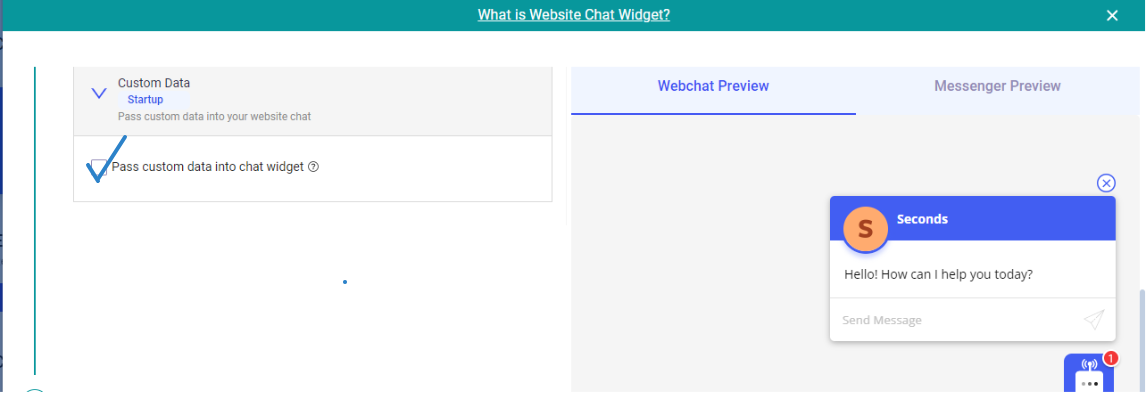
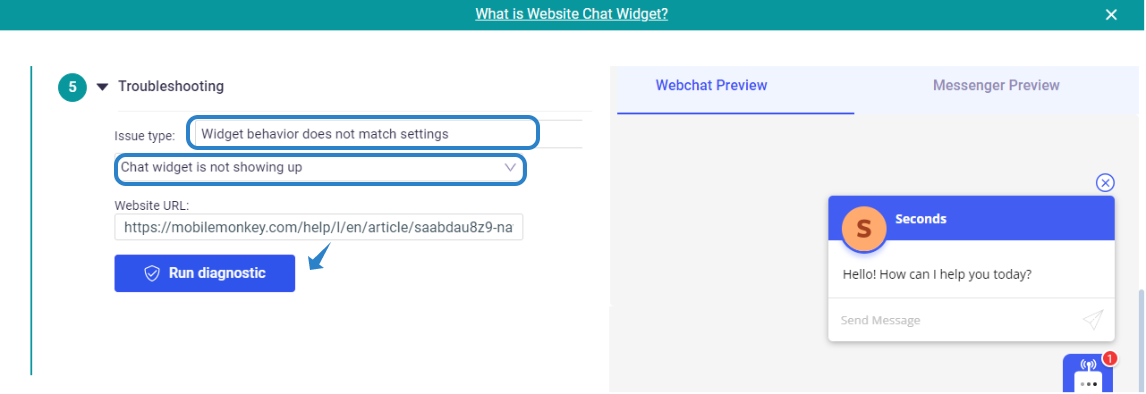
b. You can specify which pages this chat widget will display. This allows you to personalize the conversation based on which web page your users are. For example, I just want to show this chat widget to users on by blog. Therefore, I will change the operator to "contains" then, set the URL to mobilemonkey.com/blog/. In fact, this can be as simple as /blog as long as the code is installed on your website. c. If you are on the Startup, Agency or Team custom plan, you can send custom data into your website chat widget. When our Javascript is loaded, we will be able to read any tag or attribute data set by your website and set it on the website visitor's contact record after they engage with the chat widget. This will require some technical implementation on the website. More details on this article. Step 5. Troubleshooting
The troubleshooting tool will provide you an idea on what possible issue/s is causing your chat widget NOT to Display or why the widget behavior does NOT MATCH your setup.